Last time we mentioned how to go into the BIOS and adjust the settings and let the memory run to the frequency indicated by the manufacturer. Go if you haven't read it yet: How to Enter BIOS and Open XMP3.0 in Three Easy Steps!
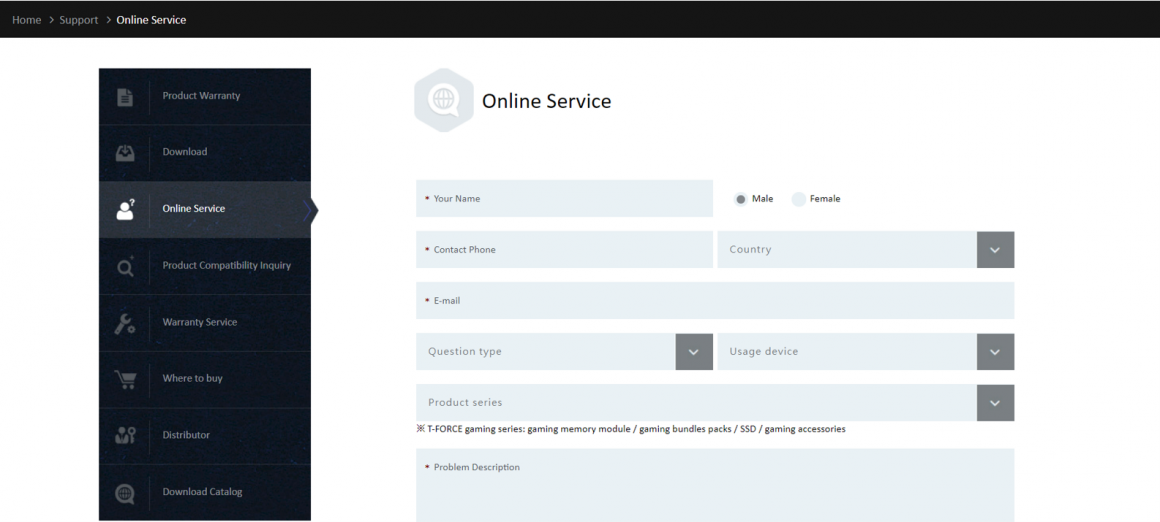
However, what if you encounter a situation where you can't boot after entering the BIOS to enable XMP DOCP? Here I will share with you T fans 3 steps, you can use this method to initially find the cause. Since there are many different situations where you can't turn on your computer after overclocking, if you still can't get rid of the problem after trying the following methods, you can use our online consultation service to get more help.
TEAMGROUP online consultation service: https://www.teamgroupinc.com/tw/support/
Step 1: Check if the motherboard supports the capacity or frequency of the overclocking memory
Not every motherboard supports high frequency or high capacity. If the motherboard itself does not support it, no matter how high specification your overclocking memory is, it will not work. Therefore, I suggest you to check this information when you purchase motherboards and overclocking memory beforehand. Here's how to find the information from the official website of the motherboard or the official website of the memory manufacturer.
1. Check the product specification sheet on the official website of the motherboard. Take the ASUS ROG MAXIMUS Z690 EXTREME as an example, go to the product page on the ASUS website, click on Tech Specs (green box), then scroll down to the memory section and you will see the memory capacity and frequency information supported by this motherboard (red box).
ASUS ROG MAXIMUS Z690 EXTREME: https://rog.asus.com/us/motherboards/rog-maximus/rog-maximus-z690-extreme-model/spec
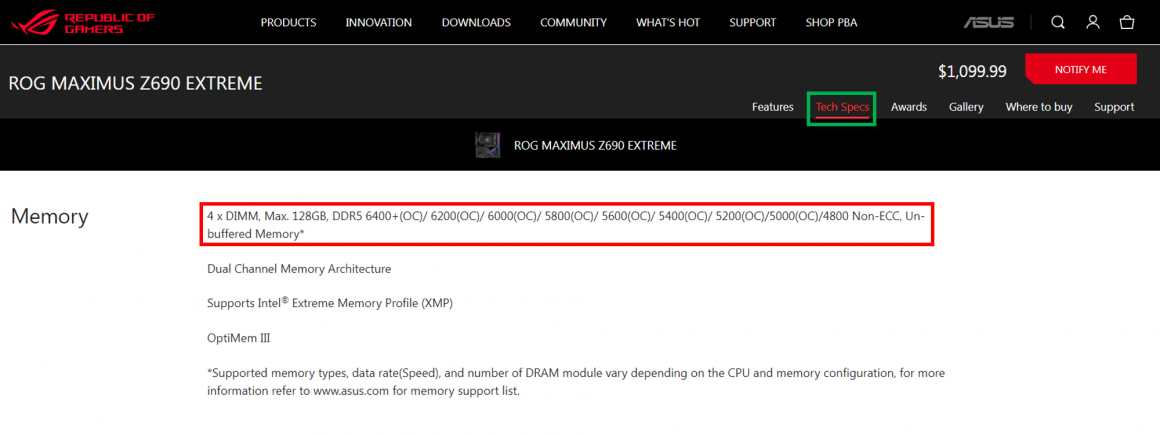
From the picture above, we can know that the ASUS ROG MAXIMUS Z690 EXTREME motherboard has 4 DDR5 U-DIMM slots, supporting a maximum memory capacity of 128GB, and supports frequency of 6400/6200/6000/5800/5600/5400/5200/5000/4800 and other specifications.
2. Check the compatibility list (QVL) of the motherboard or memory module
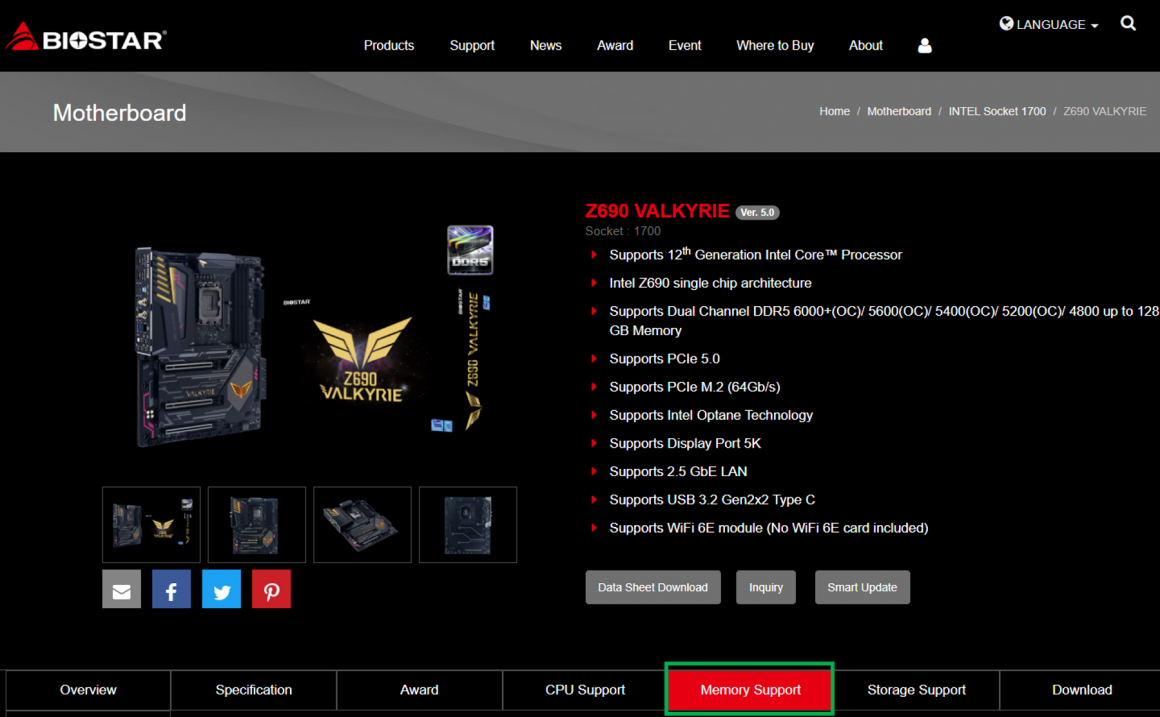
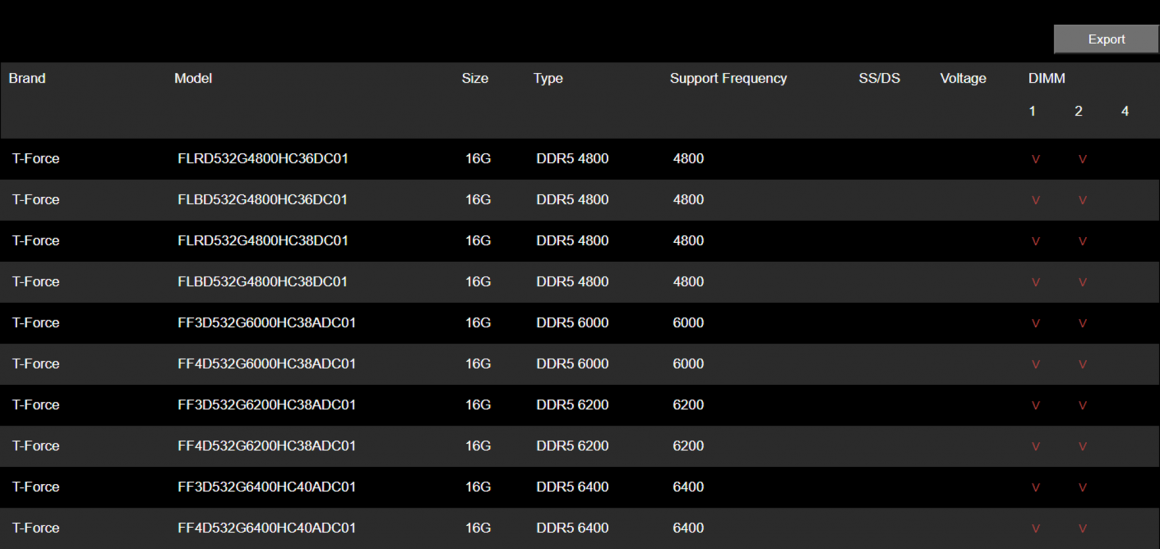
You can also use the compatibility list provided by the motherboard manufacturer or memory module manufacturer to confirm whether the overclocking memory you bought has passed the official test certification of the motherboard manufacturer. The compatibility lists of different motherboard manufacturers are presented in different ways. Take BIOSTAR’s Z690 VALKYRIE as an example, after entering the official website and selecting the product page of the motherboard, click Memory Support (green box) to see the specifications of each memory module that has passed the compatibility test.
BIOSTAR Z690 VALKYRIE: https://www.biostar.com.tw/app/en/mb/introduction.php?S_ID=1034#overview
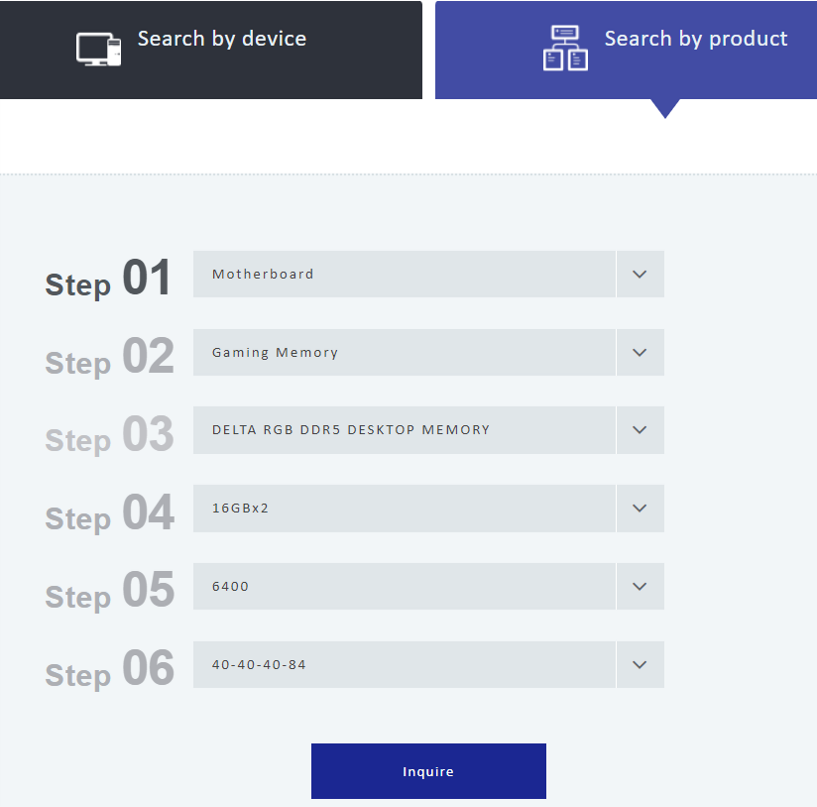
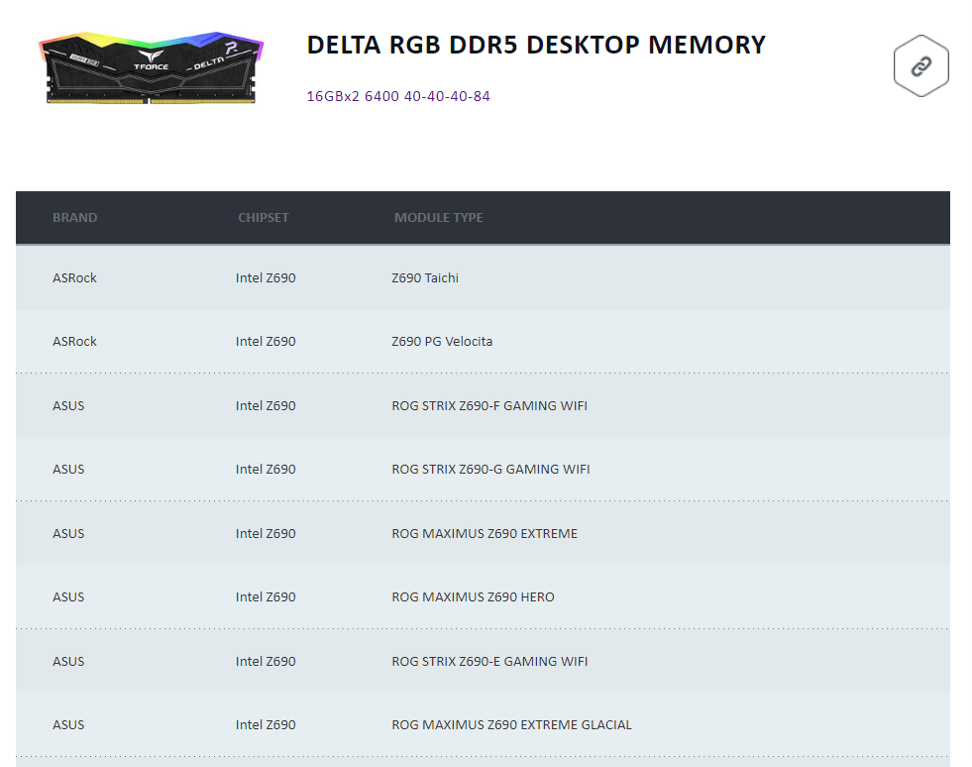
Memory module manufacturers also have compatibility lists, so you can check if the overclocking memory you purchased has passed the official test certification of those motherboard manufacturers. Take TEAMGROUP as an example, you can go to the compatibility check page and select the device you purchased or the memory product you want to check. Here we take DELTA RGB DDR5 for example, click Search by product (green box), select Motherboard first, then fill in the specification of the overclocking memory you purchased, and the result will be generated after sending.
Compatibility check: https://www.teamgroupinc.com/tw/support/compatibility.php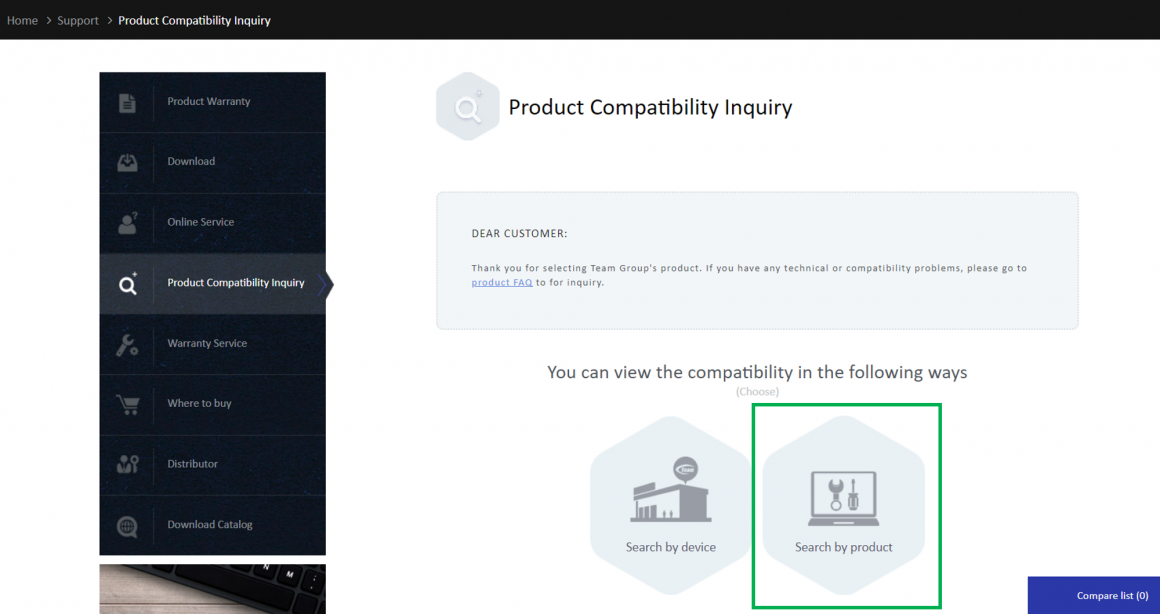
Step 2: Start the system with default memory settings to make sure the memory is working properly.
After step 1, if it is confirmed that the motherboard supports the capacity or frequency of the overclocking memory you bought, then you can enter the BIOS again, turn off the XMP or DOCP of the overclocking memory, set it back to the default value, then press F10 to save and reboot to see if the memory can operate smoothly. If you still can't boot up, you can perform a simple debugging process to test whether there is a single memory causing the problem. You can refer to the following article for instructions:
Easy memory debugging process https://www.teamgroupinc.com/tw/info/ins.php?index_id=215
If it can boot normally, you can continue to step 3 to make sure whether the current BIOS version is the latest.
Step 3: Check if the current BIOS version is the latest
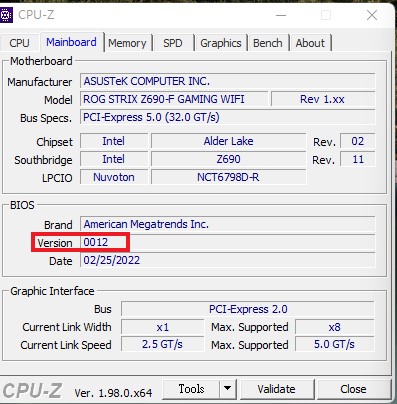
After making sure that the memory is intact and can be booted with the default settings, you can check whether the BIOS is the latest version. Currently the 600 series of motherboards support Intel's 12th generation CPU are still updating the BIOS version frequently. In order to provide consumers with overclocking needs a better overclocking experience, if you are getting this series of motherboards, you must pay special attention to your BIOS version! You can see the version number in the BIOS screen of each motherboard manufacturer, or use the free software, CPU-Z to confirm.
The download link for CPU-Z: https://reurl.cc/N63RGq
The following is a screenshot from CPU-Z. The red box is the information of the BIOS version.
The following are the latest BIOS download method for each motherboard manufacturer for your reference. Want to know how to update after downloading? Stay tuned! (Hurry up and leave a message~) If you have any questions during the process, leave a message and ask me!
1. ASUS
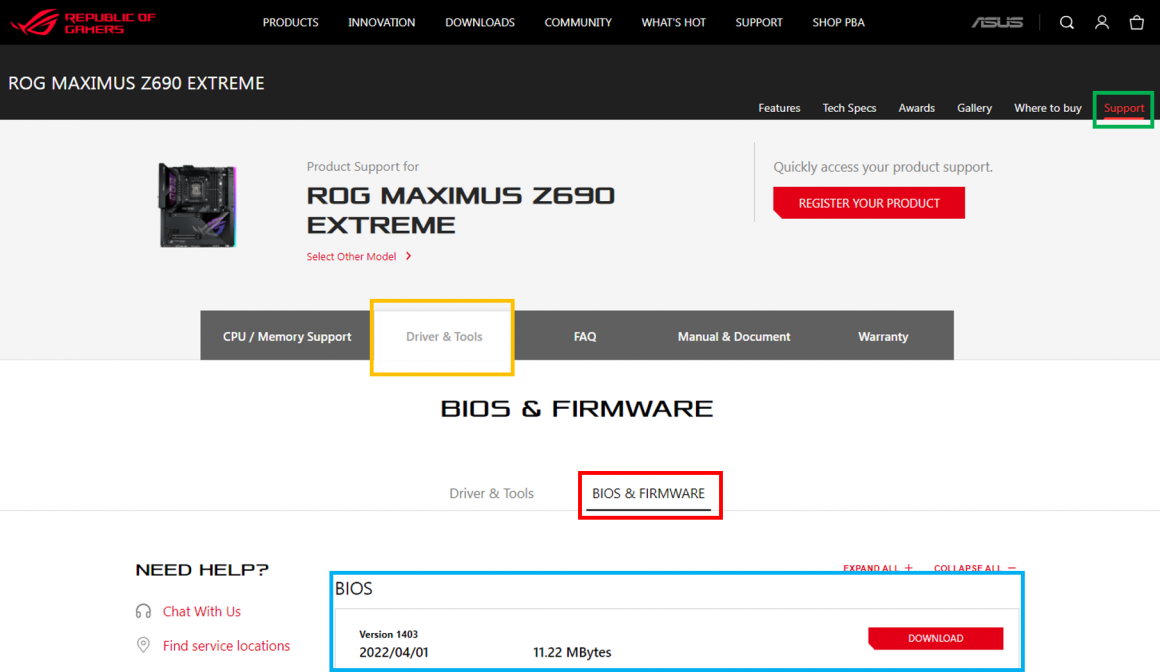
Take ASUS ROG MAXIMUS Z690 EXTREME for example, go to the product page on the ASUS official website, click Support (green box), click Driver & Tools (yellow box), and then click BIOS & FIRMWARE (red box), you will see the latest BIOS download (blue box).
ASUS ROG MAXIMUS Z690 EXTREME: https://rog.asus.com/us/motherboards/rog-maximus/rog-maximus-z690-extreme-model/helpdesk_bios
2. ASRock
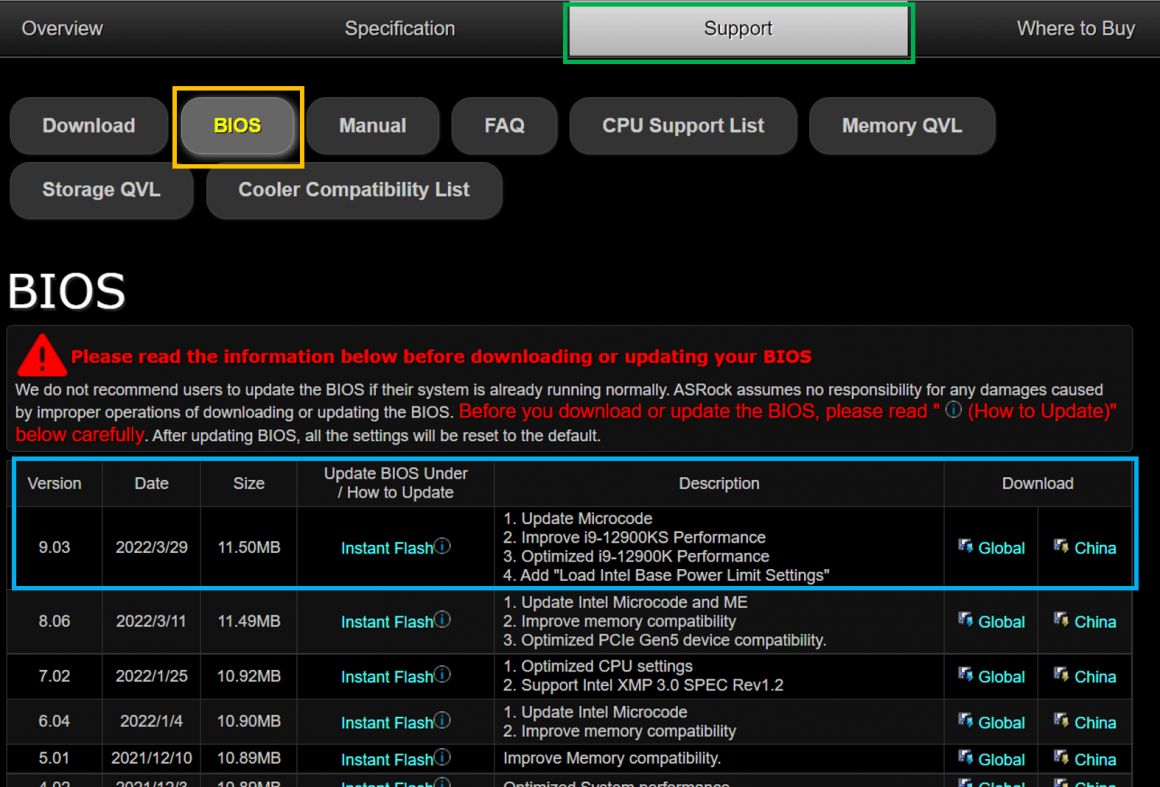
Take ASRock Z690 Taichi as an example, visit the product page of ASRock official website, scroll down and click Support (green box), then click BIOS (yellow box), you will see the latest BIOS download (blue box).
ASRock Z690 Taichi:https://www.asrock.com/MB/Intel/Z690%20Taichi/index.asp#BIOS
3. GIGABYTE
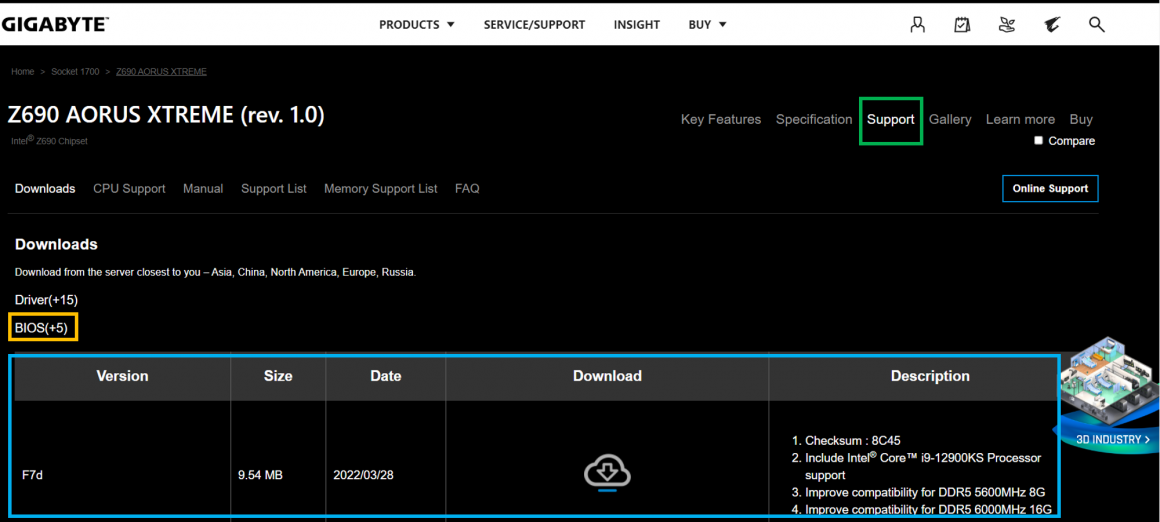
Take Z690 AORUS XTREME as an example, go to the product page of GIGABYTE official website, click Support (green box), and then click BIOS (yellow box), you will see the latest BIOS download (blue box).
Z690 AORUS XTREME:https://www.gigabyte.com/us/Motherboard/Z690-AORUS-XTREME-rev-10/support#support-dl-bios
4. MSI
Take MEG Z690 UNIFY as an example, go to the product page on MSI official website, click Support (green box), then click Driver & Downloads (yellow box), you will see the latest BIOS download (blue box).
MEG Z690 UNIFY:https://us.msi.com/Motherboard/MEG-Z690-UNIFY/support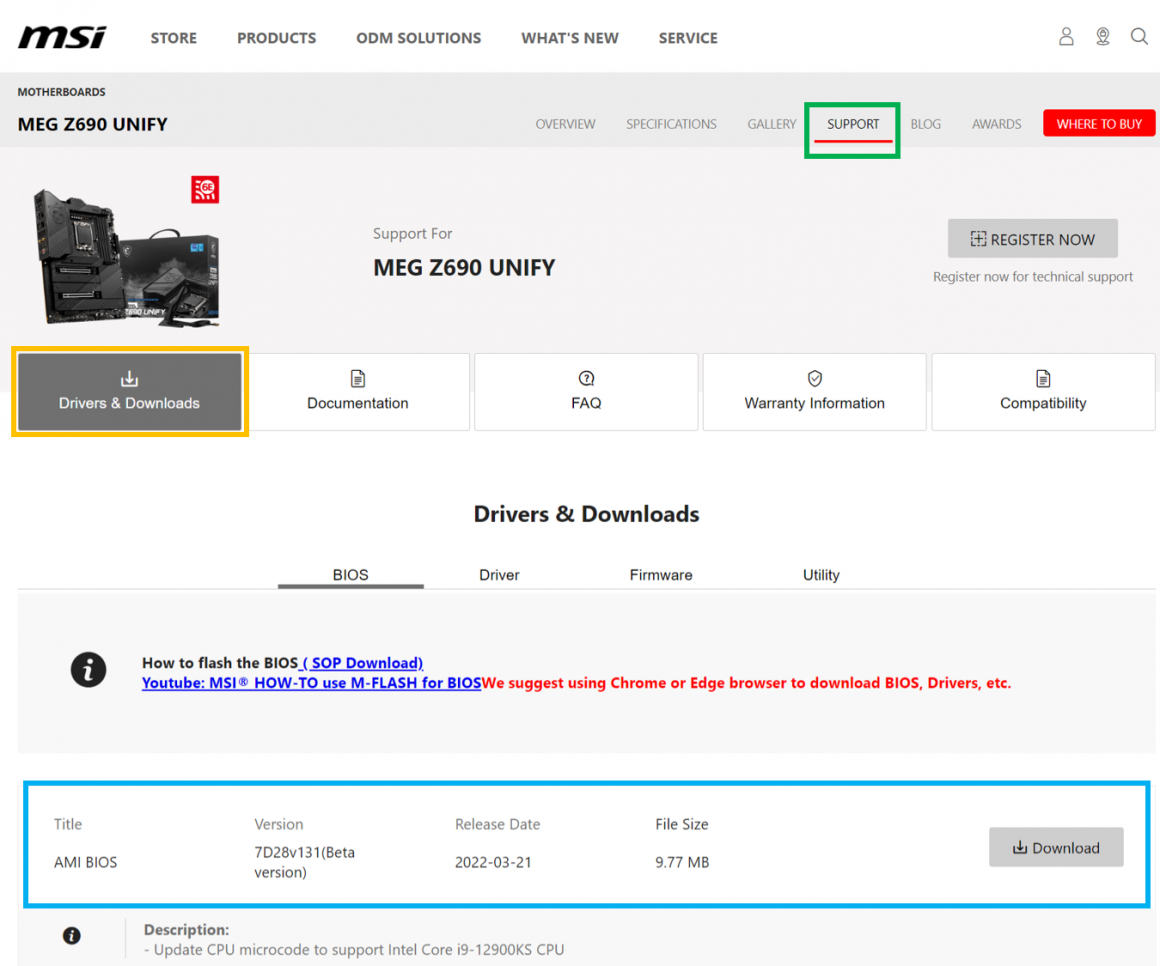
5. BIOSTAR
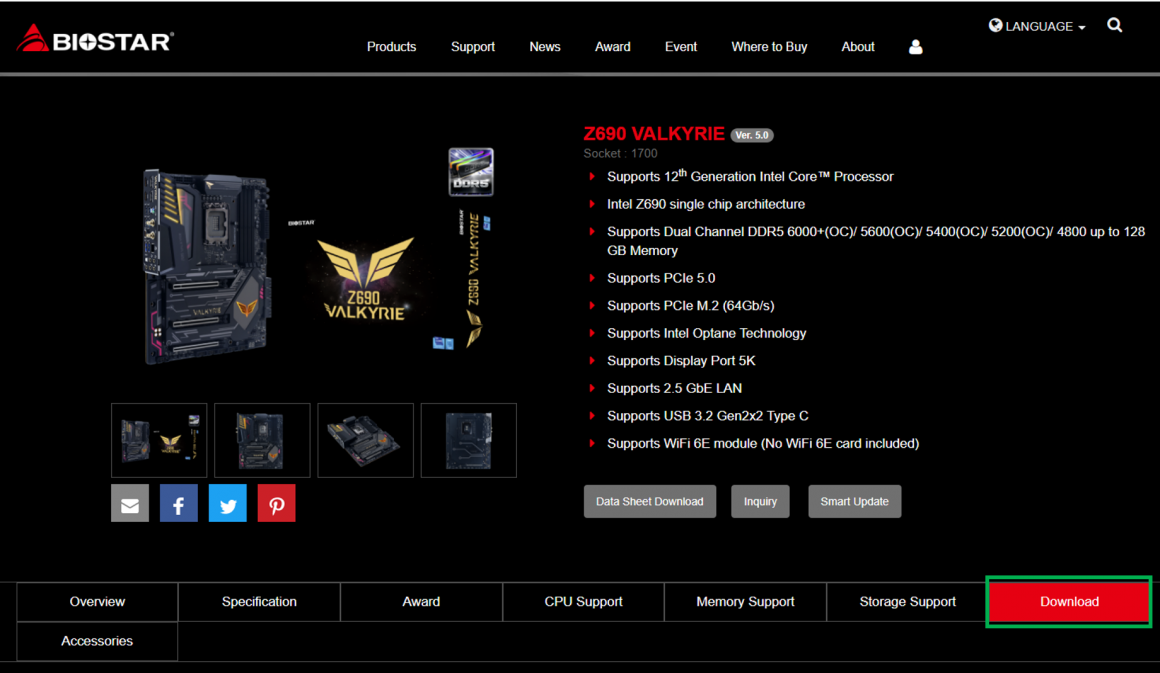
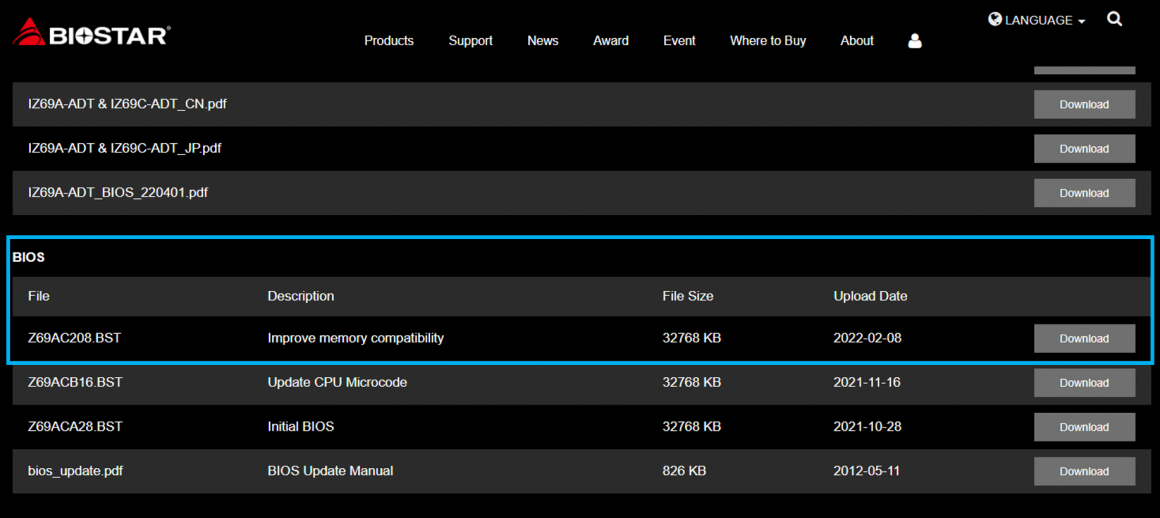
Take Z690 VALKYRIE as an example, go to the product page of the BIOSTAR official website, click Download (green box), scroll down to BIOS, and you will see the latest BIOS download (blue box).
Z690 VALKYRIE:https://www.biostar.com.tw/app/en/mb/introduction.php?S_ID=1034#download
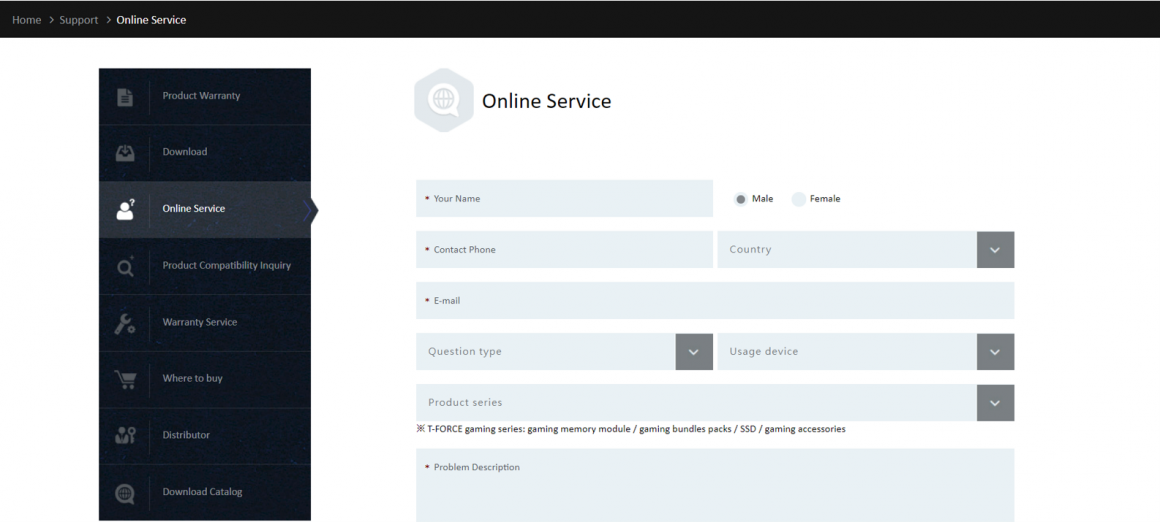
If you are still unable to boot up your computer after trying the three methods above, I suggest you provide the details of the product you purchased to the customer service channel of the memory module manufacturer or the motherboard manufacturer for assistance. If you T fans’ TEAMGROUP overclocking memory products are unable to boot up after overclocking, you can use our online consultation service to provide your overclocking memory model, specification, serial number, as well as the motherboard and CPU model and specification, and briefly describe the problem you are experiencing, and your professional customer service team will reply you as soon as possible!
TEAMGROUP online consultation service: https://www.teamgroupinc.com/tw/support/
