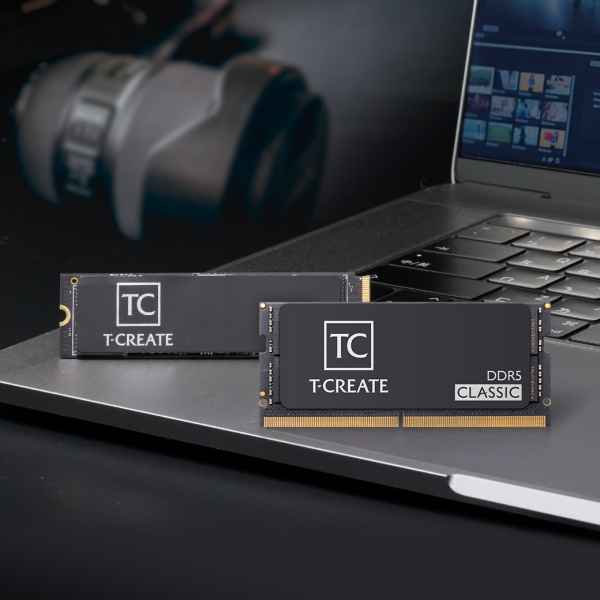
Video content creators run a race against time while working on content, therefore computer performance is crucial for video creators. For those who are already working with video editing software or want to become video creators, today, we have organized some information about how RAM (Random Access Memory) and SSD (Solid State Drive) affect content creation. Table of Contents Memory SSD Video content creators run a race against time while working on content, therefore computer performance is crucial for video creators. For those who are already working with video editing software or want to become video creators, today, we have organized some information about how RAM (Random Access Memory) and SSD (Solid State Drive) affect content creation. MEMORY Memory plays an important role for video creators who rely on fast and efficient computers for video editing. Generally speaking, the requirements for RAM, when using image and video editing software, are higher compared to requirements for most other computer software. When editing images, insufficient memory capacity often leads to freezes or lags, resulting in longer waiting times. In addition, the memory required for your task depends on factors such as software, the format of materials, and multiple applications in use. The computer runs faster with more RAM, enabling a smoother editing process without wasting any inspired moment. The following table shows the different RAM capacities and the actual impact of RAM on video content creation. Capacity Video Creation 8GB To perform video editing with a resolution lower than 1080p using 8GB RAM, it is required to close other programs. 16GB To perform 1080p or 4K video editing smoothly using 16GB RAM, it is recommended not to run background tasks or open other applications simultaneously. 32GB You can smoothly perform 1080p or 4K video editing with 32GB RAM while running background tasks with multiple applications opened. 64GB You can perform 8K video editing smoothly with 64GB RAM. Friendly Reminder We recommend that video creators decide on the appropriate memory capacity according to their working requirements.. SSD A friend of ours who specializes in video creation once had a mix-up. At that time, this friend had several projects on hand. Using a capacity of only 1TB, he spent much time on material importing and faced a problem such as a computer lagging during the creation process. At that time, he did not know the exact reason for the low speed and he thought that his computer had reached the end of its work life. After the projects were finished, he replaced the old SSD with a new 8TB SSD. Thus, as a result, the computer lag issue during the rendering was solved. Without getting professionals at the time, our friend was almost rushed to the store to get a new computer. This story clearly shows us what affects video editing performance. For those who have been encountering similar situations, we have prepared information to help you to solve the issue. Two factors with SSD significantly affect video creators: the read/write speed and capacity. Firstly, in terms of read/write speed, the read speed is related to file opening time, while the write speed is related to material importing time. Secondly, larger capacity means larger storage space for more files and materials. Moreover, SSDs with larger capacities are usually more durable, enhancing stability during creation. Friendly Reminder We suggest that creators select an SSD with a large capacity and good read/write performance under available budgets to satisfy requirements for the creation and avoid the loss of valuable inspiration while waiting for the materials to import. Regardless of RAM or SSD specifications, you can see that the Large Capacity is the most fundamental and extensive requirement for creators. T-CREATE brand under Team Group Inc. is aimed to provide creators with large-capacity RAM and SSD and to develop high-stability products. In the current environment, everyone has the opportunity to become a Creator. We hope the world will see your artwork.
Read more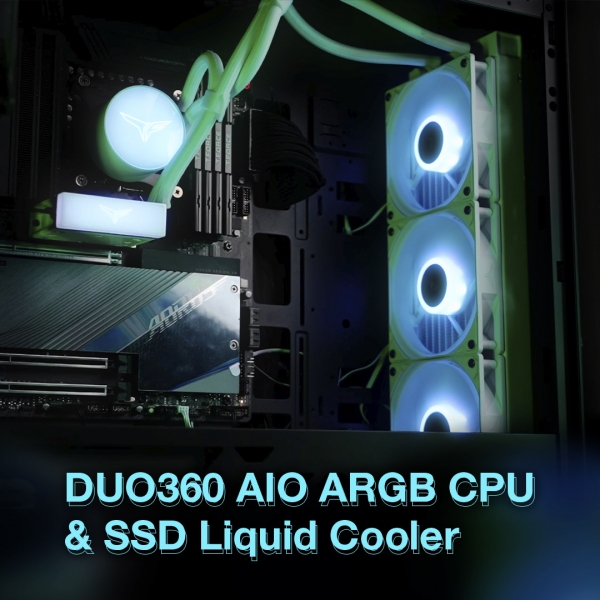
Remember the T-FORCE SIREN GD240E AIO ARGB Liquid Cooler installation tutorial that we shared with you a few months ago? TEAMGROUP recently released the industry’s T-FORCE SIREN DUO360 AIO ARGB CPU & SSD Liquid Cooler. Today I want to show you how to install it and what details should be paid attention to during installation. There is a video of the installation process below the article. For those of you who don’t like to read long texts, you can click the video below and watch it first. If there’s something you don’t understand, come back and read the text again! List Check the contents Install the fan to the water cooling row Install water block Wiring to the motherboard Check the contents With the additional M.2 SSD water block, there are more brackets, screws, and wires inside the box of T-FORCE SIREN DUO360 AIO ARGB CPU & SSD Liquid Cooler than the T-FORCE SIREN GD360E AIO ARGB Liquid Cooler that was released a while ago. In the product content of T-FORCE SIREN DUO360 ARGB CPU & SSD integrated water-cooling product, because of the addition of M.2 SSD water-cooling head, the fasteners, screw locks and wire parts will also be better than the T-FORCE SIREN GD360E released a while ago. ARGB integrated water cooling is a bit more. Install the fan to the water cooling row First, take out the fan, water cooling row and screws Ⓚ. Depending the assembly position of the case, the water cooling row and fans are installed in different locations and methods. Click the link for details. Previous article: How to properly install an AIO liquid CPU cooler? What are the differences when installed in different positions of the case? Today’s example is installed on the front of the case. The front (convex) of the fan should be installed facing the water cooling row, and the fan should be tighten to the water cooling row in diagonal order. In this way, the heat inside the water cooling row can be discharged to the outside. Then take out the screwsⓁ in the package, and lock the water cooling row to holes in the front of the case. Install water block The highlight of SIREN DUO360 AIO ARGB CPU & SSD Liquid Cooler is the dual water block design with both CPU and M.2 SSD. Let’s install the CPU water block first and then the SSD water block. 1. Install CPU water block Take the 1700 socket of INTEL’s 12th generation CPU as an example. First, tear off the double sided tape on the bracketⒸ for the 1700 socket, then place the bracket to the screw holes on the motherboard from the back. Flip motherboard to the front and tighten the screwsⓈ in four corners to secure the bracket. After placing the CPU on the motherboard, apply the thermal paste. I recommended to use the 5 dots method. Remove the copper bottom surface protection sticker on the CPU water block. Take out the screwsⒾ, tighten the water block to the motherboard in diagonal order as well. Do not screw it too tightly at once. Lock all the screws and then tighten them in the same order, so that the water block applies force to the CPU evenly, making the CPU less likely to be damaged. 2. Install M.2 SSD water block Reminder: Make sure to check the size of your own M.2 SSD. This SSD water block is only suitable for the size of M.2 SSD 2280. Take out the thermal conductive filmⓍ, remove the double sided contact surface protection sticker and put it on M.2 SSD. When placing the M.2 SSD on the bracketⒻ, pay extra attention to the direction of the connecting finger and hole of the M.2 SSD. The hole of M.2 must be on the same side as the hole of the bracket. Take out the M.2 SSD water block and pay attention to the installation direction of the water block. The screw hole should be on the same side as the hole of the bracket. Use the screwⓊto secure the water block to the M.2 bracket. When installing the assembled M.2 SSD water block to the motherboard, pay special attention to whether the motherboard has a copper pillar for fixing the M.2 SSD. Align the holes of the M.2 SSD water block with the copper pillar, and use a screwdriverⓋ to lock it to the motherboard. Unlike the CPU water block, the M.2 SSD water block has a magnetic light module. Remember to remove the light module and install it separately. Reminder: The light module can be installed on top of the M.2 SSD water block, and can also be attached to the case for decoration! After the installation of the two sets of water blocks are completed, you can take out the cable ties from the package and arrange the liquid cooling tubes of the CPU water block and SSD water block according the picture below. Wiring to the motherboard After securing the AIO CPU & SSD Liquid Cooler to the case and the motherboard, the last step is wiring! The T-FORCE SIREN DUO360 AIO ARGB CPU &SSD Liquid Cooler has two cables per fan, one for the power and one for the ARGB signal, while the CPU water block and M.2 SSD water block light module have only one ARGB signal cable each. Reminder: The ARGB signal cable is a 5V 3 PIN connector (below right), which is different from the power cable (below left)! We connect the ARGB signal cable first, then the power cable: 1. ARGB signal cable wiring Let’s take a look at the fan first. Connect the ARGB signal cables of the 3 fans in series with each other, and after the series connection is completed, take out the ARGB signal 1 to 3 breakout cableⓃ in the package and connect it to the fan ARGB signal cable. Now, the ARGB signal 1 to 3 breakout cable will have two connectors left, which are respectively connected to the ARGB signal cables of the CPU water block and the SSD water block light module, and then connect the other end of the signal cable to the 5V 3 PIN position on the motherboard. 2. Power cable wiring There are 3 sets of power cable connectors for 3 sets of fans. Take out the 1 to 3 power cableⓆ in the package and connect it to the fan power cable. Connect the other end to the position of CPU fan on the motherboard and you are done. The power cable on the water cooling row should be connected to the AIO_PUMP on the motherboard. It will be marked on the motherboard, you don’t have to worry. The T-FORCE SIREN DUO360 AIO ARGB CPU & SSD Liquid Cooler supports all the following motherboard manufacturer’s lighting software (ASUS Aura Sync/ASROCK-Polychrome Sync/BIOSTAR Advanced VIVID LED DJ/GIGABYTE RGB Fusion 2.0/ MSI Mystic Light Sync software). Not only can the fans and CPU and SSD’s water block be able to individually configured with your favorite lighting effects, but the T-FORCE ARGB memory in the hands of T-fans also supports the above lighting software, allowing everyone to customize their own lighting effects! This is the end of today’s installation tutorial, I hope it can light up everyone’s case and achieve a more efficient cooling effect at the same time!
Read more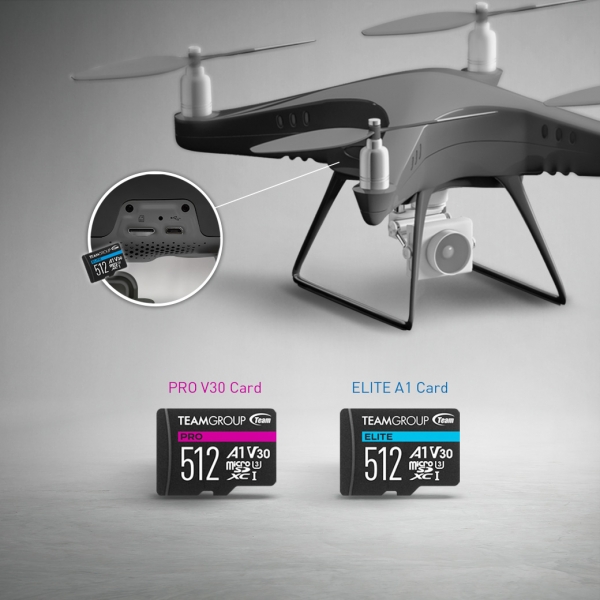
In the previous article, we mentioned the application and purchase of SD (Secure Digital) format memory card. If you haven’t done homework on purchasing SD memory card, please read this article: How to Choose an SD Card Based on Specifications. Today, let’s talk about another common, smaller memory card format – microSD. When it comes to buying microSD cards, we usually consider the capacity, price, read/write speed, good value, etc. However, I truly recommend that, as mentioned in the previous article, before purchasing a memory card, it is better to figure out the use requirements and the application of the device, so you can get a suitable memory card! This article will take 4 microSD cards of TEAMGROUP as an example, and introduce the common devices that use microSD cards on the market, and provide you information for buying microSD cards. So let’s read on! Understand the basic specifications and speed classes of microSD cards The common microSD card specifications are the same as SD cards, which are divided into SDHC and SDXC. SDHC (High Capacity) is a card from 4GB to 32GB; SDXC (extended Capacity) is a card from 64GB to 2TB, and the transfer speed is faster. When speaking of transfer speed, it is necessary to mention the speed classification marking method of the memory card. The common ones are the fooling three. Speed Class: Memory cards are often marked with a “C”. The higher the number, the faster the read/write speed per second. UHS Speed Class: It’s marked with “U”, usually 1 and 3 indicate the read and write speed. The larger the number, the faster it is. Video Speed Class: A speed standard established in response to the demand for high resolution video recording in recent years. It is marked with “V”. The larger the number, the faster the read and write speed. Note: Application performance class means the minimum random read speed and sequential transfer speed can meet both run and store execution time requirements under given conditions. The higher the number, the higher the class. In addition, the performance class of memory cards for mobile devices such as smartphones, tablets and handheld game consoles are divided into A1 and A2. It represents the processing performance of the SD card after the app is saved to the memory card. The corresponding processing performance of A1 and A2 class are as follows: App performance class Minimum write speed Minimum random read speed Minimum random write speed Class 1(A1) 10 MB/s 1500 IOPS 500 IOPS Class 2(A2) 10 MB/s 4000 IOPS 2000 IOPS The full name of IOPS is Input/Output Operations Per Second, which is the number of read and write per second. The higher the numbers means the faster the processing performance, so A2 memory card will be smoother to use compared to A1. What kind of microSD memory card should I get for my device? If you have monitoring needs, we recommend TEAMGROUP HIGH ENDURANCE CARD With the increasing demand for video surveillance and smart home, whether it is professional surveillance camera, or baby camera, pet camera and other home cameras, the requirements for video storage in our daily lives are also getting higher and higher. The TEAMGROUP HIGH ENDURANCE CARD is designed for professional surveillance camera, with a special focus on endurance and durability of surveillance storage. Unlike general storage devices, it is suitable for harsh recording environments for long-time continuous writing, and meets the requirements of various types of surveillance cameras. In addition to offering 256GB of large-capacity storage and up to 40,000 hours of surveillance storage endurance, plus a 2-year warranty, you can feel more at ease when using surveillance camera storage! In addition, this memory card uses the video recording class Video Speed V30, and supports 4K and FULL HD high-definition recording and playback. With high durability and surveillance picture quality, it is undoubtedly the best choice for the storage of surveillance camera devices! If you need smartphone expansion or backup, we recommend TEAMGROUP ELITE A1 CARD Whether it is a smartphone or a tablet, all kinds of mobile devices have become quite popular, but we often encounter the problem of App overload affecting the performance of mobile phones. Designed for Android mobile devices, the TEAMGOUP ELITE A1 CARD can reach UHS speed class 3 (U3), video speed class 30 (V30) and A1 CARD random read and write 1500/500 IOPS. It allows us to quickly run and install more applications without worrying about smartphone lagging caused by capacity limitation. TEAMGROUP ELITE A1 CARD is available in a wide range of capacities from 64GB to 1TB, which is definitely a great news for you heavy phone users! Most smartphones with 64GB memory cards are sufficient to store photos, videos and mobile games. If you often need to use your phone to shoot 4K video, a memory card of 128GB or more is recommended. In addition, TEAMGROUP ELITE A1 CARD also supports 4K Ultra HD video performance, effectively improving the smoothness of video playback! If you pursue a smooth gaming experience, then T-FORCE Gaming A2 CARD can meet your need. Switch players should be familiar with expanding console storage capacity with microSD card! The T-FORCE Gaming A2 CARD, which is designed for handheld game consoles, not only meets the need of recording high quality video, but also has an advanced read/write speed of 100/90MB/s and capacity options of 256GB, 512GB and up to 1TB, allowing you to pick the right size according to your gaming storage need. It is a great choice for handheld game consoles and smartphone game players to expand the capacity easily! Moreover, the T-FORCE Gaming A2 CARD with A2 (App Performance 2) class guarantees 4000 IOPS and above 2000 IOPS for random read and write, and optimizes the mobile device applications. More commands can be executed simultaneously, allowing players to enjoy the gaming world without any lag! If you often use action cameras, we recommend TEAMGROUP GO CARD to you Portable and flexible action camera has captured the hearts of many consumers with its ability to work in harsh environments and record high-quality, stable videos. Therefore, it is crucial to have a memory card designed for the function of action camera! TEAMGROUP GO CARD memory card for action camera meets the performance required for shooting Full HD and 4K ultra-high quality videos. Its durable characteristics such as waterproof, dustproof, X-ray proof and cold proof are very suitable for extreme sports players who shoot in harsh environments! For general purpose of recording videos and taking photos with an action camera, we recommend using a 64GB GO CARD to meet almost all your needs. Just remember to bring a few extra spare memory cards with you! However, 4K video files are quite large, if you want to record 4K ultra HD videos with an action camera, I highly recommend 128GB or more just in case! GO CARD has a variety of capacities from 32GB to 1TB to choose from, which can definitely meet all your needs! The popularity of the use of drone has gradually increased in recent years, and mostly used in recreational filming. So, a microSD memory card that offers stable recording while flying is the key! TEAMGROUP GO CARD is fast, high performance and compliant with UHS speed class 3 (U3). It is also an excellent partner for drone camera users. Conclusion There are many different kinds of memory cards on the market, so how to choose the most suitable memory card? You can start with the device you need! For professional surveillance needs, you can choose TEAMGROUP HIGH ENDURANCE CARD that emphasizes durability and endurance. If you need to expand or backup your mobile device, choose TEAMGROUP ELITE A1 CARD for both price and performance. If you are a Switch player, you can’t miss the T-FORCE Gaming A2 CARD! If you like to record videos with an action camera, then you must choose the TEAMGROUP GO CARD that can take care of both durability and stable recording. After reading the above, I hope it can help you better understand how to choose the most suitable memory for different devices!
Read more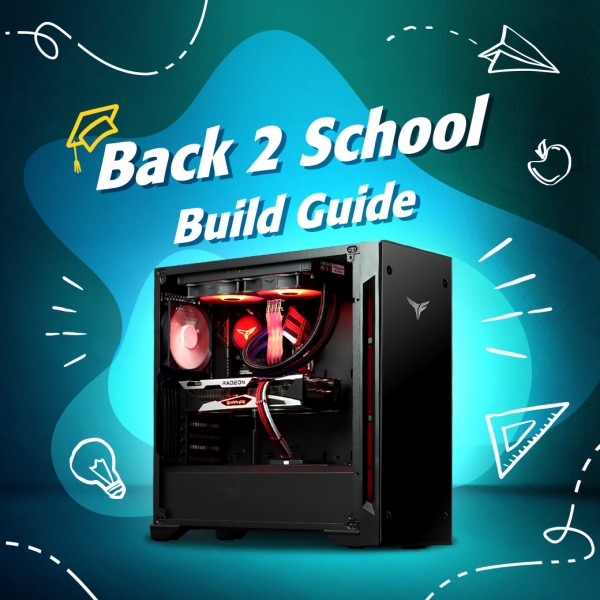
Building a computer from scratch has always been a challenge for some, yet for others it is a huge thrill. Today we are going to go through some components which will be paired up to create a computer that will be called Back2School and can be used for that segment but also for gaming. First of all, let's list all the components needed to build your personal computer. We are going to go with newest generation of Intel Core processors and pair it up with the fastest RAM on the market, DDR5. Parts that we need to build a computer are: Processor Motherboard RAM SSD CPU cooler Case Power supply Graphic card Processor – Intel Core i5-12600k With total number of 10 cores and 16 threads, this processor will give both an enthusiast and a newcomer in the computer world some nice performance without any hiccups. The newest generation of Intel Core processors really brings something interesting to the table when it comes to work, school and gaming. It is based on LGA 1700, it can be used without dedicated graphic card and still can give enough juice for us to be able to work normally. Intel Core i5-12600k: https://reurl.cc/ErMNQK Motherboard – ASRock Z690 Phantom Gaming ITX Now this board is an ITX form factor, but there is always a possibility to run an ATX board if the case supports. This one gives us a chance to build a small form factor computer for compact desk size, but also can be placed in a standard MIDI tower. Supports DDR5, Gen 4x4 M.2 SSDs and loads more which will be more than enough to pair up everything and to get amazing performance. ASRock Z690 Phantom Gaming ITX: https://reurl.cc/ZA5dN6 RAM – TEAMGROUP T-FORCE DELTA RGB DDR5 2x 16GB 6400MHz Now these RAMs, are excelent in their capacity and speed, they look extremely awesome. Especially because of their great lighting. On a board with 2x RAM slots, we get 32GB of RAMs which is more than enough for everything, work, school or gaming. Their speed gives us some nice performance. T-FORCE DELTA RGB DDR5: https://www.teamgroupinc.com/en/product/delta-rgb-ddr5 SSD – TEAMGROUP T-FORCE VULCAN Z 480GB SSD is crucial to have to shorten down those loading times, should it be for opening a certain application, software or game loading. The fastest option is M.2 NVMe SSD and paired up with this motherboard, Gen 4x4 like TEAMGROUP T-FORCE CARDEA A440 PRO. But for a budget option, which is still viable, you could always go with 2.5” SSDs such as TEAMGROUP T-FORCE VULCAN Z 480GB. Much faster and more reliable than your average hard drive. T-FORCE CARDEA A440 PRO: https://www.teamgroupinc.com/en/product/cardea-a440-pro T-FORCE VULCAN Z: https://www.teamgroupinc.com/en/product/vulcan-z-ssd CPU cooler – TEAMGROUP T-FORCE GD240E SIREN ARGB Processors need some nice cooling while under heavy load and most of the times stock coolers can't do the job properly. For this build, we are going to use TEAMGROUP T-FORCE GD240E SIREN ARGB AIO which can cool down the Intel Core i5-12600k nicely and yet have a nice visual aspect inside your build because of the lights and the design. T-FORCE GD240E SIREN ARGB: https://www.teamgroupinc.com/en/product/siren-gd240-all-in-one-argb-cpu-liquid-cooler Case – TEAMGROUP T-FORCE LARES ARGB CASE It is always important to have a case that has a nice airflow configuration with the fans. TEAMGROUP T-FORCE LARES ARGB CASE brings some new design in the computer case market, with solid airflow even though it looks that the front tempered glass might block it. With some nice intake and outtake, this case give use and the components we are going to use inside, some nice lower temperatures. T-FORCE LARES ARGB CASE: https://www.teamgroupinc.com/en/product/lares-argb-case Power supply – NZXT C650 When it comes to powering your computer, you always need to carefully choose and decide which one can give enough power to your system and which one is solid in stability. Usually, for such a computer we are building, 650W 80Plus Gold would be just enough. There is also an option for you to choose a non-modular or fully modular power supply, which recommendation would go for the fully modular just because then you can nicely re-arrange cables on the front and at the back since you don’t have to use all of the cables. NZXT C650 Gold: https://reurl.cc/rDjbo1 Graphic card – SAPPHIRE RADEON RX 6650 XT NITRO+ That one component that games, helps render videos and pictures and does all the magic inside your computer. This time we choose a card that can game quite nicely in 1440p with Ultra detailed above 60FPS, yet still in collaboration with a solid processor bring nice performance in workloads. SAPPHIRE RADEON RX 6650 XT NITRO+ is an outstanding mid-range graphic card. SAPPHIRE RADEON RX 6650 XT NITRO+: https://reurl.cc/lojbaj
Read more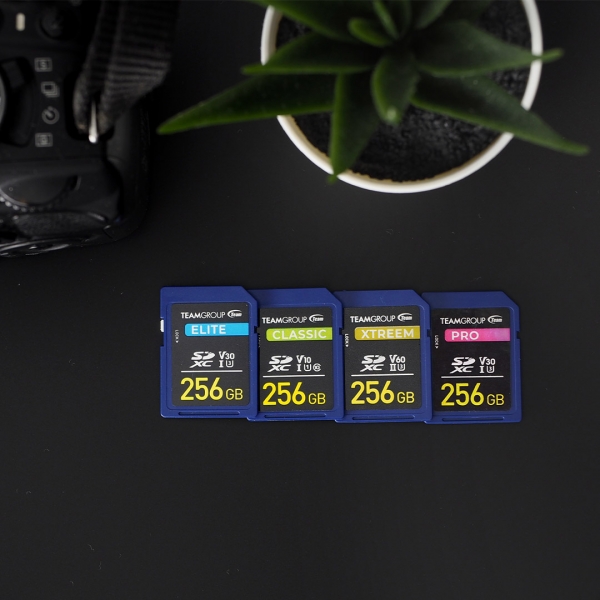
In today's article, we would like to talk about memory cards of form factor SD (Secure Digital). If we want to buy an SD card, what is the first thing we think about? What is the main purpose of the card going to be? Some of you will probably start to think about the brand, but apart from that it is important to look deeper, or in other words, we need to check the specifications. Let's take a look at the specifications of SD cards from TEAMGROUP and understand for which group of users these cards were created. The most common and popular types of SD Cards are SDHC and SDXC formats. SDHC ( High Capacity ) ranges from 4GB to 32GB, and are the most common format today which means that most devices are compatible. SDXC (eXtended Capacity ) ranges from 64GB to 2TB, which also have more speed in transferring data compared to the aforementioned SDHC. Let's talk more about data transfer. In today's article, all the Four SD cards of TEAMGROUP have UHS (Ultra High Speed) technology. The cards are also in the category of Video Speed Class (V) from V10 to V60. TEAMGROUP's SD Cards are the answer to the increasing demand for high resolution and high-quality video recording. These SD cards are all waterproof, X-Ray proof and dustproof which makes them the best companion for travel bloggers and outdoor photographers. Check out the cards >> CLASSIC, ELITE, PRO, XTREEM What Capacity should I choose for my Camera? Recommended capacity will vary based on purpose since everyone has different needs. For example, if you use your camera only for taking pictures, a capacity of 32GB-64GB should be enough for you. However, if you take pictures but also shoot videos, then 128GB-256GB may prove more beneficial. The Classic and Elite Card is a perfect solution for this. What card should I choose for 4K or 8K resolution? For professional photo and videographers who shoot up to 4K resolution, you can also use The Elite Card. If you need a higher data transfer speed however, TEAMGROUP recommends buying The Pro SD Card that has R/W up to 100/90MB/s to save your time. While shooting in Full HD and 4K is becoming mainstream, shooting in 8K resolution is also now an option. In terms of file sizes and storage, 8K is four times the number of pixels as 4k, which leads to very large file sizes when shooting. This makes it ever more important for the videographer to choose the right SD card. With this in mind, The XTREEM Card is here to save the day. With the technology of V60 and up to 250/120MB/s data transfer you can focus more on doing what you love and spend less time transferring files. Thanks for reading, share your experience with SD cards below and let us know what SD Cards you love to use!
Read more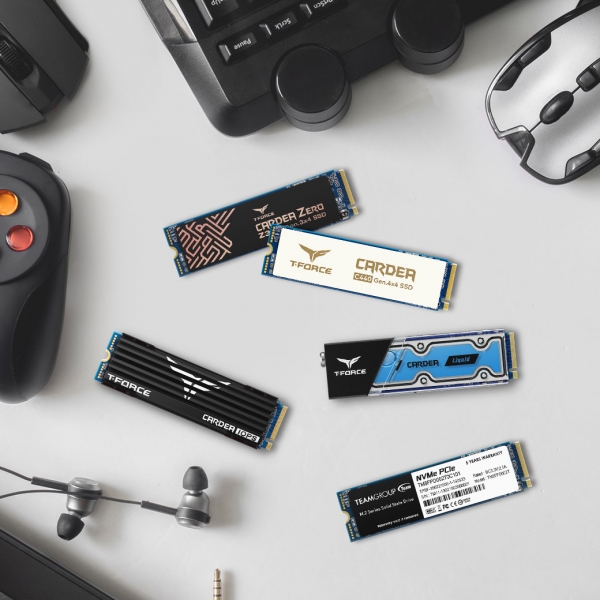
As the price of M.2 PCIe becomes more affordable, there is now a variety of M.2 solid state drives on the market. The rise of AMD has also accelerated the popularity of the high-end Gen4x4. What are the differences between these various M.2 PCIe SSDs? How should we pick the most suitable SSD? Today, I will introduce the various M.2 PCIe SSDs released by TEAMGROUP, which currently has the largest variety of SSD heat sinks. 1. Without heat sink The most common M.2 SSDs are bare chips, which means they have no heat sinks. Without the cost of a heat sink, this type of product focuses on basic differences such as specifications and durability, which makes it a real bargain. Learn more about TEAMGROUP M.2 PCIe SSD Frankly, whoever uses better materials and cheaper prices will be the biggest winner. It is a very realistic market and the customer base is also more consumer oriented; the downside is that there is little choice in appearance and limited cooling capacity. If you are concerned about the look or using SSD frequently for a long time, it is recommended to choose a product with a heat sink. 2. With heat sink Now let’s talk about the ones with heat sinks. TEAMGROUP’s T-FORCE offers very comprehensive solutions for gamers to choose from, including graphene, ceramic, water cooling, and aluminum fins, which can be adapted to different usage environment and appearance requirements. Learn more about T-FORCE M.2 PCIe SSD The main function of the heat sink is to maintain the high-speed operation of the M.2 PCIe SSD and avoid activating the speed reduction protection mechanism due to high temperature. I personally also choose the product with a heat sink. TEAMGROUP’s T-FORCE M.2 PCIe SSDs have a rule of naming. A single word is used in the front to distinguish different types of heat sinks, and the number at the back to represent PCIe version and bandwidth. For example, 340 represents Gen3x4, so now you can follow this logic to get an SSD! A. Graphene heat sinks: If you see Z at the beginning of a T-FORCE SSD model, it means the heat sink is built by graphene. For instance, Z330, Z340, Z440, etc. are all made of graphene as the base material, and different styles are designed at the top to make product differences. Learn more about T-FORCE CARDEA ZERO Z330 M.2 PCIe SSD, Where to Buy Learn more about T-FORCE CARDEA ZERO Z340 M.2 PCIe SSD, Where to Buy Learn more about T-FORCE CARDEA ZERO Z440 M.2 PCIe SSD, Where to Buy According to the test result on the official website, the cooling effect is more than 9% higher than the SSD without the heat sink. It is because the laminated glue between graphene and copper foil is also heat dissipative. This cooling solution has also obtained a Taiwan invention patent. Another advantage is that the overall thickness of the heat sink is less than 1mm, so you don’t have to worry about the structural problems between different components. After installation, it is just like installing a product without a heat sink. It is so thin and still has a powerful cooling capability, and that’s what makes this patent so amazing! B. Ceramic heat sinks: The letter C at the beginning of a T-FORCE SSD model means the heat sink is built by ceramic. Currently, there is a C440, which is very unique and designed with white and gold, is now available. Learn more about T-FORCE CARDEA Ceramic C440 M.2 PCIe SSD , Where to Buy The ceramic material itself has the characteristics of high heat dissipation wattage and no heat storage. However, during TEAMGROUP’s test, we found that the cooling effect of the case with a fan was as high as 18% while the case without a fan, which is less common in the market, was only 2%. This difference is quite consistent with the characteristics of ceramic itself that its thermal conductivity is better than thermal dissipation. The two heat sinks above are generally heat stinks with a better thermal conductivity than heat dissipation. In other words, if there is a fan that brings air convection into the case, and with the heat conducted from these two materials, a powerful cooling effect can be archived. C. Water cooling heat sinks: T-FORCE CARDEA LIQUID is a product that has been widely discussed since its release. The main reason is that the liquid in this SSD is not flowing like the CPU water cooling, which has led many people to question the heat dissipation capacity of this water cooling. Learn more about T-FORCE CARDEA LIQUID, Where to Buy This type of water cooling is really not as good as CPU water cooling. After all, CPU water cooling not only convects water, but also dissipates heat with a fan. But in fact, Gen3x4 SSD does not generate heat as much as CPU. Relatively speaking, it does not require such a powerful cooling device to cool it down, but we just collectively call it “water cooling”. So what is the cooling capacity of this product: According to the test, there is no big difference between whether there is a fan or not, and they can both reach around 13% of cooling effect, which means the effect is not bad. By the way, this product has a big feature. Many gamers pay attention to the integration of the PC build, therefore T-FORCE offers a variety of different colors of water cooling liquid. The amazing thing is that this water cooling liquid can also be mixed with each other to create special colors, which is simply a gospel for PC DIY enthusiasts. Learn more about CK5 Coolant Kit Some gamers mentioned that if the water cooling liquid gets too hot, will it boil and burst? The boiling point of the water cooling liquid inside is 187℃, which is not that easy to make the water cooling liquid boil, so don’t worry about it. D. Aluminum fin heat sinks: CARDEA II has the most powerful cooling effect in the series. The design of this model can be said is the pioneer of various SDD heat sinks on the market. It is made of common aluminum with special structural design on top to enhance heat dissipation. This cooling solution has also obtained a Taiwan patent. Learn more about T-FORCE CARDEA II M.2 PCIe SSD, Where to Buy The current test can achieve a cooling effect of up to 21% in a case with a fan. The 15% indicated on the official website seems to be a conservative estimation, because it has a stronger cooling capacity than previous models. However, it should be noted that the height of this heat sink is relatively high. If it is installed in the PCIe slot closest to the CPU, due to the height, a larger graphics card may be stuck when it is plugged in. It is recommended to change the graphics card to an upright position, which is less likely to damage the pin. You can also install the SSD in the next slot to avoid the above problem. 3. Specification Next is the specification. Now the market is generally divided into Gen3 and Gen4 specifications, which refers to the PCIe version. As for the Gen3x4 we often refer to, the x4 in the back represents the number of channels. The specific choice of which M.2 PCIe SSD to use depends on the compatibility of your motherboard and CPU, which we can find out from the SPEC of your motherboard. Source: https://rog.asus.com/motherboards/rog-crosshair/rog-crosshair-viii-dark-hero-model/spec/ Currently, AMD’s X570 and B550 two chipsets can support Gen4 M.2 PCIe SSD. INTEL is open on some of the Z490 chipset motherboards, and it is expected to be generally open after Z590. If the motherboard is not one of the above chipsets, just remember to buy the Gen3x4 at most. It is not worth it if you buy a Gen4x4 SSD in pursuit of maximum speed and end up with no support.
Read more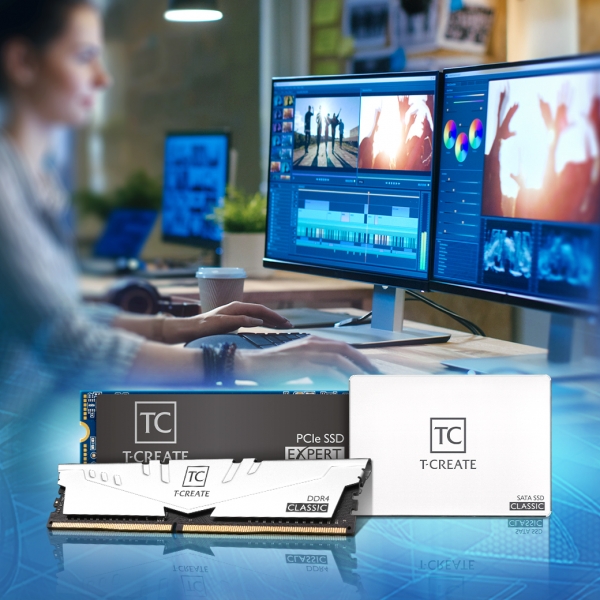
Today let's talk about the trending topic that has been widely discussed since last year: Creator. What is the difference between this type of products and the gaming products that have been very popular in recent years? Which manufacturers are on board with this trend? What are the features of TEAMGROUP's "T-CREATE" series? Around last July, Intel announced the result of an internal survey, which pointed out that about 200 million people around the world use PCs to create photo, video and 3D content, and 60% of them are interested in the so-called "Creator PC". Just like the rapidly growing gaming market in recent years, Intel believes that this is a very promising market in the future, therefore PC manufacturers are flocking to release a variety of creator products. The entire market also began to have some news and reviews as the expansion of the diversification of the number of products, and the number of consumers using these products increased, which is probably the origin of this creator trend. Source: https://news.xfastest.com/interview/67216/intel的創作者pc將現今個人電腦市場再細分/ The difference between gamers and creators From the origin previously mentioned, we can see that both creator products and gaming products come from an increase in user demand: The "nerd" who played games in those years jumped on the scene and become a gamer, the entire gaming community was suddenly energized and the gaming market was created. With the growing development of self-media and the improvement of the quality and functionality of creative software, a large number of creators have appeared. In addition, the higher consumer demand for PC specifications has also created a market for creators. However, the literal definitions of the two are completely different. The following is the explanation from these aspects. 1. On the aspect of appearance The appearance of gaming products tends to be more black and red, with crazy looks or even RGB lighting to catch people's attention. The appearance of the creator products is a low-key silver gray with simple and elegant design. The style is both tasteful and pleasant. T-FORCE XTREEM ARGB DDR4 T-CREATE CLASSIC 10L DDR4 2. On the aspect of performance The pursuit of "extreme" performance in gaming products requires even faster speeds, so overclocking is the answer. For creator products, the priority is to pursue "stability", and speed must be increased under the premise of stability, rather than unlimited pursuit of extreme performance. T-FORCE XTREEM DDR4 T-FORCE CARDEA Ceramic C440 M.2 PCIe SSD T-CREATE EXPERT M.2 PCIe SSD 3. On the aspect of expansion The expansion of gaming products tends to be more comprehensive in terms of peripherals, such as support for high-quality headphones, high-definition live camcorders and other gaming accessories. The expansion needs of creator products are high speed transfer interfaces like Thunderbolt3, or large storage spaces such as NAS. T-FORCE SPARK RGB USB This is the most basic difference between the gaming market and the creator market, and other differences may vary depending on manufacturer's characteristics. Which brands have entered the “Creator” market currently? Here are a few brands as examples. 1. ASUS ProArt The ASUS ProArt has its own independent website, a wide range of products, and custom optimized software, all of which show ASUS's high level of care in many small details. ASUS ProArt (Learn More) 2. MSI Content Creator MSI also has its own website with a variety of products, but almost all news on the market are regarding laptops. The MSI Creator Series laptops do have many features specially designed for creators. MSI Content Creator (Learn More) 3. GIGABYTE AERO Among PCB board manufacturers, Gigabyte is relatively conservative, maybe it's because they are still sitting on the fence. Gigabyte has released a laptop designed for creators. Its performance and design style can fully meet the needs of creators. GIGABYTE AERO (Learn More) 4. ADATA Made for Creators Among the storage manufacturers had long had an independent page on its official website where it offers products to creators. However, the products that can be seen on the independent page are all existing products, so let's look forward to new creator products from them in the future! ADATA Made for Creator (Learn More) 5. TEAMGROUP T-CREATE Of all the memory manufacturers, TEAMGROUP was the first to make a new product that was truly exclusive for creators. TEAMGROUP has even raised its creator products to the same level as the T-FORCE brand, placing great emphasis on the creator market, therefore it is a valuable reference in the creator market. TEAMGROUP T-CREATE (Learn More) What is T-CREATE? T-CREATE is an all new brand launched by TEAMGROUP in September this year. It was released later than PCB board manufacturers, but it is still the first among storage manufacturers. T-CREATE spends a lot of time investigating actual usage needs. Compared to laptops, memory and SSD are not products that can be used directly, therefore it is necessary to accurately classify consumer groups and understand their usage in order to launch products that respond to consumers' needs. For the differences between TEAMGROUP, T-FORCE, and T-CREATE, which are the three brands under TEAMGROUP, the following is the ability distribution diagram that we often see when playing games, so you can easily see what their characteristics are. In addition, here is a product matrix of existing T-CREATE products. More T-CREATE products will be launched in the future to expand this product matrix. According to market demand, the T-CREATE series did not start with a 4000MHz memory or a Gen4x4 SSD that reads and writes 5000MB/s, but rather focused on durability and stability, with frequency and speed taking second place. You can go to the official website of TEAMGROUP T-CREATE for more detailed product specifications. T-CREATE Memory (Learn More) T-CREATE SSD (Learn More) Where to Buy
Read more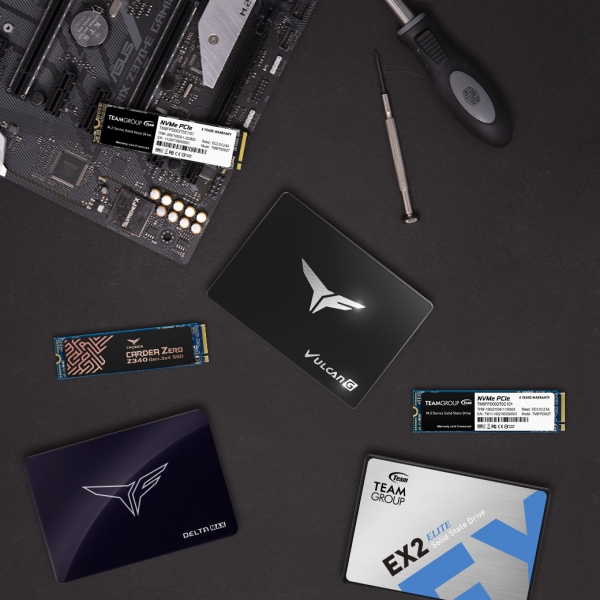
Previously, we talked about what you should be aware of after getting a new memory: "Tutorial of Memory Unboxing – The 5 Things You Should Do After Buying a New Memory". Today, we'll talk about SSD, which is a very big portion of products that are used when installing or upgrading computers. For those who are not familiar with it, you may be afraid to pick an SSD or install it yourself. In fact, it's not that scary at all. After reading this article, you will feel much more confident about it! 1. Keep the proof of purchase Generally speaking, SSDs are covered by a 3 to 5 year warranty from the date of purchase. Since it's not like the way of logging in and uploading an invoice from motherboard or video card manufacturers to prolong the warranty, it is very important to keep the proof of purchase (invoices, receipts, electronic invoices, etc.). If the proof of purchase is lost, the warranty period will be advanced to ex-factory date, which may loss more than a week of the original warranty period. Don't forget to protect your rights and interests. 2. Unpack the package of the SSD Unpacking an SSD package requires a few tips. Usually both 2.5" SATA and M.2 PCIe are protected inside a blister, especially M.2 SSD, which is thinner and more fragile than the memory, and may break in two if you unpack too violently. It is recommended that you push the SSD out of the blister instead of pulling it hard. 2.5" SATA SSDs are usually covered with a tamper sticker on the outside of the case, try not to remove it. If the temper sticker is broken, the warranty of the manufacturer will be void. The M.2 SSD comes with similar warranty terms, the warranty will be void if the tamper sticker is removed! Demo SSD: T-OFRCE CARDEA LIQUID M.2 PCIe SSD 3. Verify the installation location The interfaces of 2.5" SSD and M.2 PCIe are completely different, and the corresponding connection locations on the motherboard are different as well. The supported interface of 2.5" SSD is SATA and requires separate power and SATA cables. The detailed location is as shown. (Motherboard SATA location) (Power cable) (two ports of the 2.5” SSD) There's nothing more annoying than having more and more cables in your PC, so the M.2 is simply a blessing to me, the editor. M.2 reduces two cables at a time, just need to plug and lock the M.2 onto the motherboard. The detail of the ports is as shown below. (Location of the M.2 on motherboard, lock using screws) 4. Using as system drive First, plug the UFD with Windows installation software into the computer and press DELETE to enter the BIOS. Make sure that the computer recognizes the newly installed SSD and UFD. (BIOS screenshot) Then go to BOOT, move the UFD to the first position, and adjust the newly installed hard drive to the second position, press F10 to save the changes and leave the BIOS. If the adjustments are made according to the above sequence, the computer should automatically reboot after leaving the BIOS and enter the Ready to install Windows screen. Format the SSD before installing Windows. After formatting, you can choose whether to split the capacity. Local drive (C:) and Local drive (D:) are what comes out the after partitioning, commonly known as C drive and D drive. If you have limited budget, you can setup a C drive with smaller capacity and a D drive with larger capacity, and try to install most of your applications in D drive. The simpler the C drive, the better. However, the downside of a single hard drive is that data may disappear if the hard drive is broken, so be sure to do an online cloud backup! If your budget is sufficient, it is recommended to buy a smaller capacity SSD as a boot drive (C:) and a larger capacity SSD as a data drive (D:). This way, there is no need for partitioning, you can have two hard drives in different drives. You don’t have to worry about the data on the data drive being affected if the boot drive is not working properly. 5. Using purely as data drive If you just want to expand a hard drive to store data, you can ski the previous step. However, you should pay attention that after installing and booting into Windows, you still can't see the new drive because the hard drive has not been formatted and can’t be used directly Now, please move your mouse cursor to the Windows icon on the lower left and right click on the mouse. Next, select Disk Management. The SSD originally installed with Windows should be displayed as "Disk 0", and your newly installed SSD will be displayed as "Disk 1", as shown below. Please right click on the area of Disk 1 and select format. Usually the default NTFS format is used. Then press OK, the system will automatically start to format for you, and when the formatting is complete, you can see your new drive in the local machine! 6. Verify if the speed is up to the standard Nowadays, manufacturers in the market put the read/write speed of the SSD on the website and on the package. There is an unwritten rule that the speed manufacturers labeled is actually the higher value of the data they can actually measure. If you have average luck, the data you get from your home test will be slightly lower than indicated but not far off. If you are lucky, you might also get a faster SSD! After all, even the same controller with the same Flash IC may not have the same result. The following software is commonly used to test SSDs. The first thing you should do is to see if the Sequential speed (Sequential read/write speed) is the same as indicated. First let's take a look at the CrystalDiskMark (CDM) which is the most commonly used software. The following software is commonly used to test SSDs. The first thing you should do is to see if the Sequential speed (Sequential read/write speed) is the same as indicated. First let's take a look at the CrystalDiskMark (CDM) which is the most commonly used software. Next is the AS SSD Benchmark, which is commonly seen in reviews In addition to testing the read/write speed, this one can also switch to IOPS data from the View on the upper location, which is quite a unique function. Just press Start at the bottom and wait for a while, it is very easy to use. There are a lot of speed software available online, so if you are interested in, you can download them and try them for fun! In fact, the advanced application of SSD also includes different types of RAID methods, which will be explained later. I'll end today's introduction here, and I hope it can help those who are not familiar with how to operate the internal parts of the computer. After reading this article, you can bravely take your first step towards DIY a PC!
Read more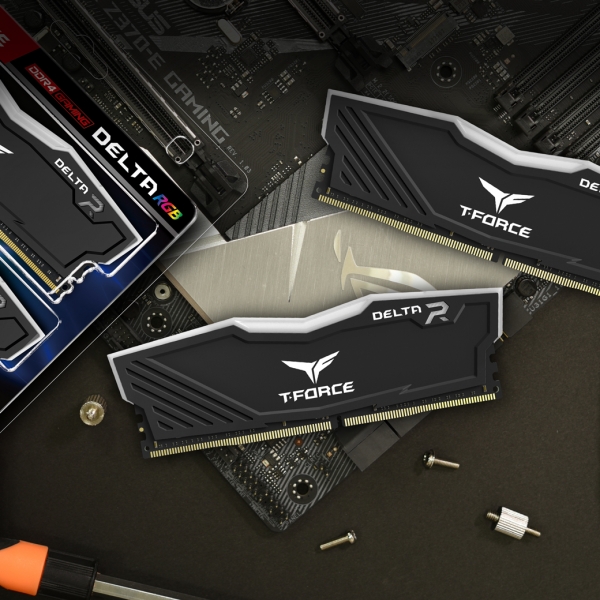
After using the computer for some time, many people want to upgrade their computers when they start to experience lag and slowdown. Usually, the first thing that comes to mind is to upgrade the SSD and the memory. Here are the 5 things you should do after you get a new memory. 1. Open the package of the memory There are a few things to pay attention to on the packaging as well! The mainstream memory packaging on the market is divided into blister and carton sleeve packaging. The label information on the packaging is particularly important. On the packaging of TEAMGROUP's memory, the product specifications, features, ICON introduction are clearly labelled, making it easy to understand at a glance. T-FORCE DELTA RGB DDR4 Where to buy Don't be too violent when you open the outer packaging and take out the memory. The gold contacts and IC are very fragile. 2. General visual inspection of the entire memory Major inspection item: Are the gold contacts brand new, no scratches or oxidation? Is the PCB intact, no breakage, burrs? The next is to see if the heat spreader is flat. However, I have never encountered any of these problems, so just think of it as a routine checkup. *Please avoid squeezing the IC when holding the memory. In addition, there is a product serial number sticker on every memory that you buy. Do not remove this sticker. You have to keep the sticker in order to have valid lifetime warranty. 3. Plug it onto the motherboard The memory is designed to be error-proof. The left and right sides of the middle notch are different in length. Please pay attention to the direction you insert it, otherwise the gold contacts may break if you force plugging it in! The wiring method of each motherboard is slightly different. Please refer to the user manual of the motherboard to make sure the location of the dual-channel when plugging in two memory sticks. The following image is an explanation in the ASUS motherboard user manual. The memory installation methods has been explained in “The process to handle memory errors”. Reminder: Make sure to turn off the power supply before installing or uninstalling the memory, otherwise the memory may be damaged if the power is still on! 4. BIOS setting After plugging it in, make sure there are no problems with other components first, and then boot the computer. However, please check the status of the memory in BIOS before entering Windows. Please press the DELETE button in the first screen after you press the boot button, or press DELETE like crazy after you press the boot button to enter the BIOS. There are some basic information after entering the easy mode screen of BIOS, but there’s not much that can be adjusted. You can adjust more with the memory after entering the advanced mode. Since different motherboard manufacturers have different hotkeys, you can refer to the description on the screen. The memory with frequency above 3200MHz on the market is dominated by overclocking memory. Only a few meet the native JEDEC 3200MHz specification, not to mention that high frequency such as 3600MHz, 4500MHz which require BIOS settings. Next, I'll show you how to reach the overclocking frequency that the manufacturer claimed, so don't ask again why only 2666MHz is displayed when you buy a 3600MHz one. Currently, there are four major motherboard manufacturers and they are divided into INTEL and AMD. For more details, please refer to: "How to overclock your RAM?" Take INTEL series of ASUS motherboard for example: After entering the advanced mode, press the right arrow key on the keyboard to move to "Extreme Tweaker" Next, press enter to select "Ai Overclock Tuner" and change to XMP, then you can press F10 to save and leave BIOS. This is a way to simply turn on XMP to read the content of the SPD in the memory. It is simple and easy for rookies, and you can correctly overclock to the frequency indicated in the memory by the following steps. If you want to adjust the frequency manually, here is a brief introduction to manual overclocking, but the matching of values and some more detailed adjustments require experience accumulation. In the same way, on the "Extreme Tweaker" page, please go to "DRAM Frequency" and press Enter to select the frequency. After selecting the frequency and press Enter to confirm, scroll down to "DRAM Timing Control" and press Enter, then you will see "DRAM CAS# Latency" which is the CL value. The next three cells of CL need to be adjusted accordingly, then try again on your own. After adjusting the CL value, voltage is the next to be considered. Press the left arrow key to go back to the previous page of the CL setting, go down to the "DRAM Voltage" and input voltage. It also requires experience to determine how much voltage is sufficient to support the set frequency. Reminder: It is recommended to increase the voltage little by little Setting too high at a time may cause memory damage! New gamers may not be able to get into Windows, and keep entering BIOS automatically due to incompatible values or settings that exceed the highest frequency supported by the motherboard and CPU. Now adjust the values again, or press the shortcut to restore all settings to default factory values, then you can enter Windows again! 5. Check the overclocking information At this point, the preparation is basically done. Don't rush to play the game just yet, make sure that the content you just adjusted is actually working. Check the operation status of the memory by using the CPU-Z software. After downloading and running the software, click on the "Memory" at the top, and then look at the DRAM Frequency at the bottom. The displayed value multiplied by 2 is the frequency in the actual operation. CPU-Z download Why multiply it by two? The full name of DDR4 is Double Data Rate, therefore we need Double to calculate the frequency. Beneath the frequency, you can also see the CL value in operation. Conclusion That's it for the basic introduction to memory. Now you can also buy components to upgrade your computer, or install it yourself!
Read more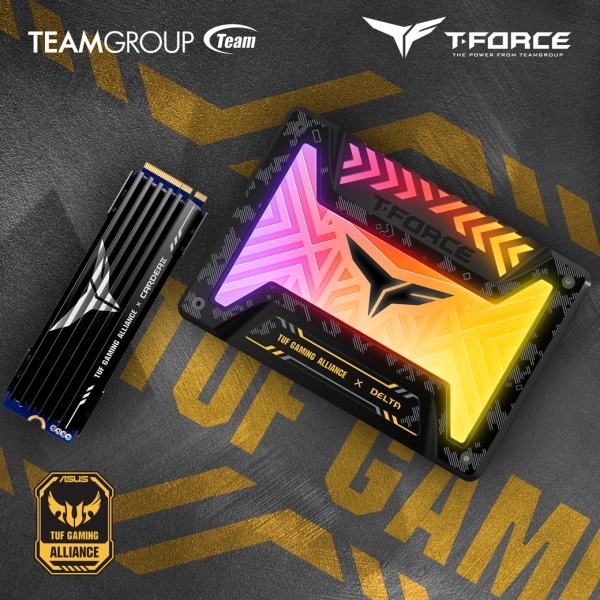
The military style, co-branded DELTA TUF Gaming Alliance RGB SSD(5V) and CARDEA II TUF Gaming Alliance SSD released by TEAMGROUP are all very representative. The former is the industry’s only 2.5” SSD with the largest luminous area, while the latter is the first M.2 SSD certified by TUF Gaming Alliance! The newly launched ASUS TUF Gaming Z490-PLUS[WI-FI] follows TUF Gaming Alliance’s black and gold color design, with the unique twill design on the I/O shield and southbridge to fully showcase TUF Gaming’s hardcore military style. Motherboard ASUS TUF Gaming Z490-PLUS[WI-FI] Unboxing Let’s take a look at the co-branded DELTA TUF Gaming Alliance RGB SSD(5V), and also review the previous generation, co-branded DELTA S TUF Gaming Alliance RGB SSD(12V). The main difference between the two is the light source connector. Since some motherboards only support 5V or 12V connectors, and TUF’s latest Z490 and B550 series motherboards already support 5V header, therefore TEAMGROUP releases the 5V version this time. In addition, the 5V version can display colorful stream of light while the 12V version can only display a single color at a time, which is caused by different light source connectors. T-FORCE DELTA TUF Gaming Alliance RGB SSD (5V) Packing T-FORCE DELTA TUF Gaming Alliance RGB SSD (5V) Unboxing T-FORCE DELTA TUF RGB SSD (Learn More) Where to Buy There’s also co-branded CARDEA II PCIe SSD available now! This CARDEA II TUF Gaming Alliance SSD with streamlined cooling fins is TUF Gaming Alliance’s “first” certified co-branded M.2 PCIe SSD. The T-FORCE logo in the middle is a magnificent design, and the TUF Gaming Alliance x CAREDEA II names at the bottom will get you very excited! T-FORCE CARDEA II TUF Gaming Alliance M.2 PCIe SSD Packing T-FORCE CARDEA II TUF Gaming Alliance M.2 PCIe SSD Unboxing PCIe is easy to generate heat during operating. After various experiments, the angle of this cooling fin is designed to provide the most powerful heat dissipation. T-FORCE’s design is very consumer-oriented! T-FORCE CARDEA II TUF M.2 SSD (Learn More) Where to Buy Let’s see how it actually performs. T-FORCE DELTA TUF Gaming Alliance RGB SSD, CARDEA II TUF Gaming Alliance M.2 PCIe SSD Installation As for the DELTA TUF Gaming Alliance(5V), if the read/write speed of 2.5” SSD can reach 500MB/s and above, it is considered to be a high quality SSD. The difference in speed between 550MB/s and 540MB/s is not that much, so we won’t test it here. However, as an M.2 PCIe SSD, it is necessary to undergo a speed test. The following CARDEA II TUF Gaming Alliance SSD 512GB is tested with three softwares. 1. The most common CDM (CrystalDiskMark) Considering fairness concern, we have only taken the result in the first test. The read speed of this SSD is 24MB/s less than the 3400MB/s on the official website, but the write speed is actually 439MB/s more than 2000MB/s. The overall speed performance is very satisfactory. 2. AS SSD Benchmark This test got 4178 points with CARDEA II TUF Gaming Alliance 512GB. It will get even higher points with the 1TB. Switching to the AS SSD Benchmark IOPS, we can see that the CARDEA II TUF Gaming Alliance also has excellent performance. 3. Tx Bench The performance of Seq 256K Q32T1 and CDM 1MQ8T1 are similar. In different situations, the performance of the CARDEA II TUF Gaming Alliance is very stable, which is a very important requirement for SSDs. Conclusion The DELTA TUF Gaming Alliance(5V) is updated with the support of TUF motherboard. The exterior design inherits the military style of TUF Gaming Alliance, and the color change has advanced from a single color to multiple colors. If you like the TUF Gaming series, you should definitely get it and match with the motherboard! The CARDEA II TUF Gaming Alliance has a black background color with a magnificent T-FORCE LOGO. Certified by ASUS TUF Gaming, the upper aluminum fin heatsink will not interfere with the components on the motherboard. It has powerful heat dissipation capability and ultra-fast computing speed. What are you waiting for? Get it home now! Learn more about TUF series co-branding: T-FORCE VULCAN TUF DDR4 Where to Buy T-FORCE DELTA TUF DDR4 Where to Buy T-FORCE DELTA TUF RGB SSD Where to Buy T-FORCE CARDEA II TUF M.2 SSD Where to Buy
Read more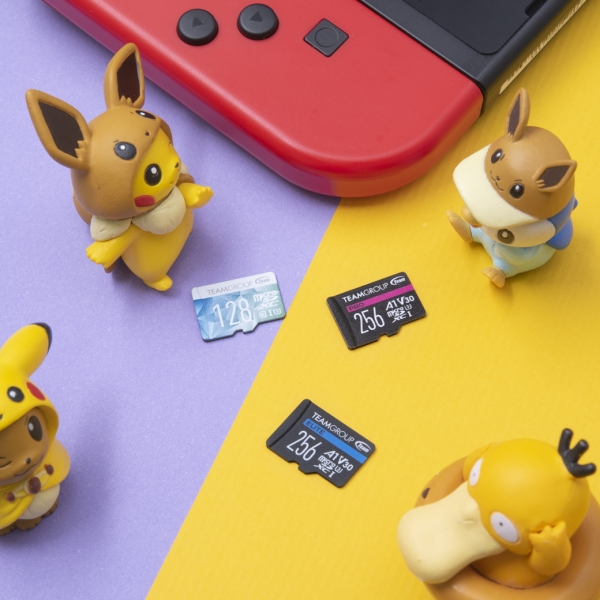
Due to the recent pandemic, people are spending more time indoors and the demand for gaming consoles has increased significantly. Switch is great for use at home or on the go, therefore currently it has become the best choice for purchasing a gaming console. 1. SWITCH firmware update In April of this year, Nintendo announced the latest 10.0.0 version of the firmware update, adding super useful features: In “Data Management” of the console, data can be transferred between the internal storage and the microSD card! Switch supports microSD card expansion. Supported cards includes microSD, microSDHC and microSDXC. It is only compatible up to Speed Class UHS-I and not compatible with UHS-II. Resource: Nintendo Official Site In the past, data stored in the internal storage could not be transferred to a microSD card as it can now be transferred to a gaming console directly. The latest firmware update makes it a lot more user-friendly. As for other new features such as the News Bookmark function, option to remap the controller buttons, etc., please visit Nintendo Official Site for more details! 2. MicroSD cards that are highly recommended Speaking of using the microSD card, the following are considered in terms of capacity, price, read/write speed, and good value. We will introduce TEAMGROUP memory cards suitable for the use on the Switch, and you will see that TEAMGROUP memory cards are cutting edge in every way! TEAMGROUP PRO V30 U3 MicroSD CARD 256GB Capacity: 256GB R/W Speed: 100/90 MB/s Warranty: Lifetime warranty Value rating: Medium PRO V30 is the highest-level A1 card among the current microSD cards of TEAMGROUP. Its speed is no less than the products of Samsung and SanDisk. Since it is the most high-end product with a top speed, the price is slightly higher than other TEAMGROUP memory cards, therefore we give it a medium value rating, which is recommended for gamers who are looking for ultra-fast boot speed and loading speed. TEAMGROUP PRO V30 U3 MicroSD CARD (Learn More) Where to Buy TEAMGROUP ELITE A1 U3 MicroSD CARD 256GB Capacity: 256GB R/W Speed: 90/45 MB/s Warranty: Lifetime warranty Value rating: High The ELITE is the next tier of the PRO, the price of it is slightly lower than the PRO, and it’s only a bit slower in terms of read speed. This is also the product we are testing in the following. The loading speed is very fast and overall it is a real bargain. If you wants to buy a microSD card for your Switch, this will be the most recommended product! TEAMGROUP ELITE A1 U3 MicroSD CARD (Learn More) Where to Buy TEAMGROUP COLOR CARD II MicroSD CARD 128GB Capacity: 128GB R/W Speed: 90/45 MB/s Warranty: Lifetime warranty Value rating: High This memory card has similar specification with the ELITE, except it has the A1 performance level. However, the A1 level is the SD Association’s IOPS definition for mobile phone usage. The most important thing for the Switch is the game read speed, therefore there is no big difference without the A1 level. Plus, it is cheaper, which is one of the reasons we highly recommend this product. TEAMGROUP COLOR CARD II MicroSD CARD (Learn More) Where to Buy 3. Why microSD card is great for enthusiastic gamers? One microSD card can solve your storage capacity problem Have you ever bought many digital games and run out of console’s internal storage? Want to record your gameplay but there isn’t enough storage space? A suitable microSD card can solve your problems! In the following test, the Switch has only 2-3 games but takes up 80% of console’s internal storage. Let’s see the difference after they are transferred to the SD card! Friendly reminder: Game progress can only be saved in the internal storage of the console. So, when the internal storage is full, you may not be able to save the games. It is recommended to reserve storage space for safety! 4. How to insert microSD card? How to transfer games after installation? First, the microSD card slot is located at the back, behind the long black cover on the bottom left. When you open it gently, you will hear a “click” sound. This cover is also designed as a stand to support the main body so that it can be played standing upright. Then, as shown in the image, insert the microSD in the correct direction, and if you feel it bounce back a little, that means the installation completes. Friendly reminder: The upper cover is where the game card slot is located. You won’t find microSD card after opening this cover. If the SD card is inserted while power on, the following screen will appear. Please select restart. After restart, if you want to transfer data from console’s internal storage to the SD card, go to “Data Management” in “System Settings”. The following screen appears when you select “Move Data Between System / microSD Card”. Then select “Move to microSD Card” to bring up all the software that can be transferred from the current console. Select a game, such as Fornite as below, then click “Move Data” on the right and it’s done! In conclusion, it makes a big difference when Switch is with a microSD card. Go get your Switch and microSD card now guys!
Read more