Previously, we talked about what you should be aware of after getting a new memory:
https://www.teamgroupinc.com/en/info/ins.php?index_id=82
Today, we’ll talk about SSD, which is a very big portion of products that are used when installing or upgrading computers. For those who are not familiar with it, you may be afraid to pick an SSD or install it yourself. In fact, it’s not that scary at all. After reading this article, you will feel much more confident about it!
 1. Keep the proof of purchase
Generally speaking, SSDs are covered by a 3 to 5 year warranty from the date of purchase. Since it’s not like the way of logging in and uploading an invoice from motherboard or video card manufacturers to prolong the warranty, it is very important to keep the proof of purchase (invoices, receipts, electronic invoices, etc.). If the proof of purchase is lost, the warranty period will be advanced to ex-factory date, which may loss more than a week of the original warranty period. Don’t forget to protect your rights and interests.
2. Unpack the package of the SSD
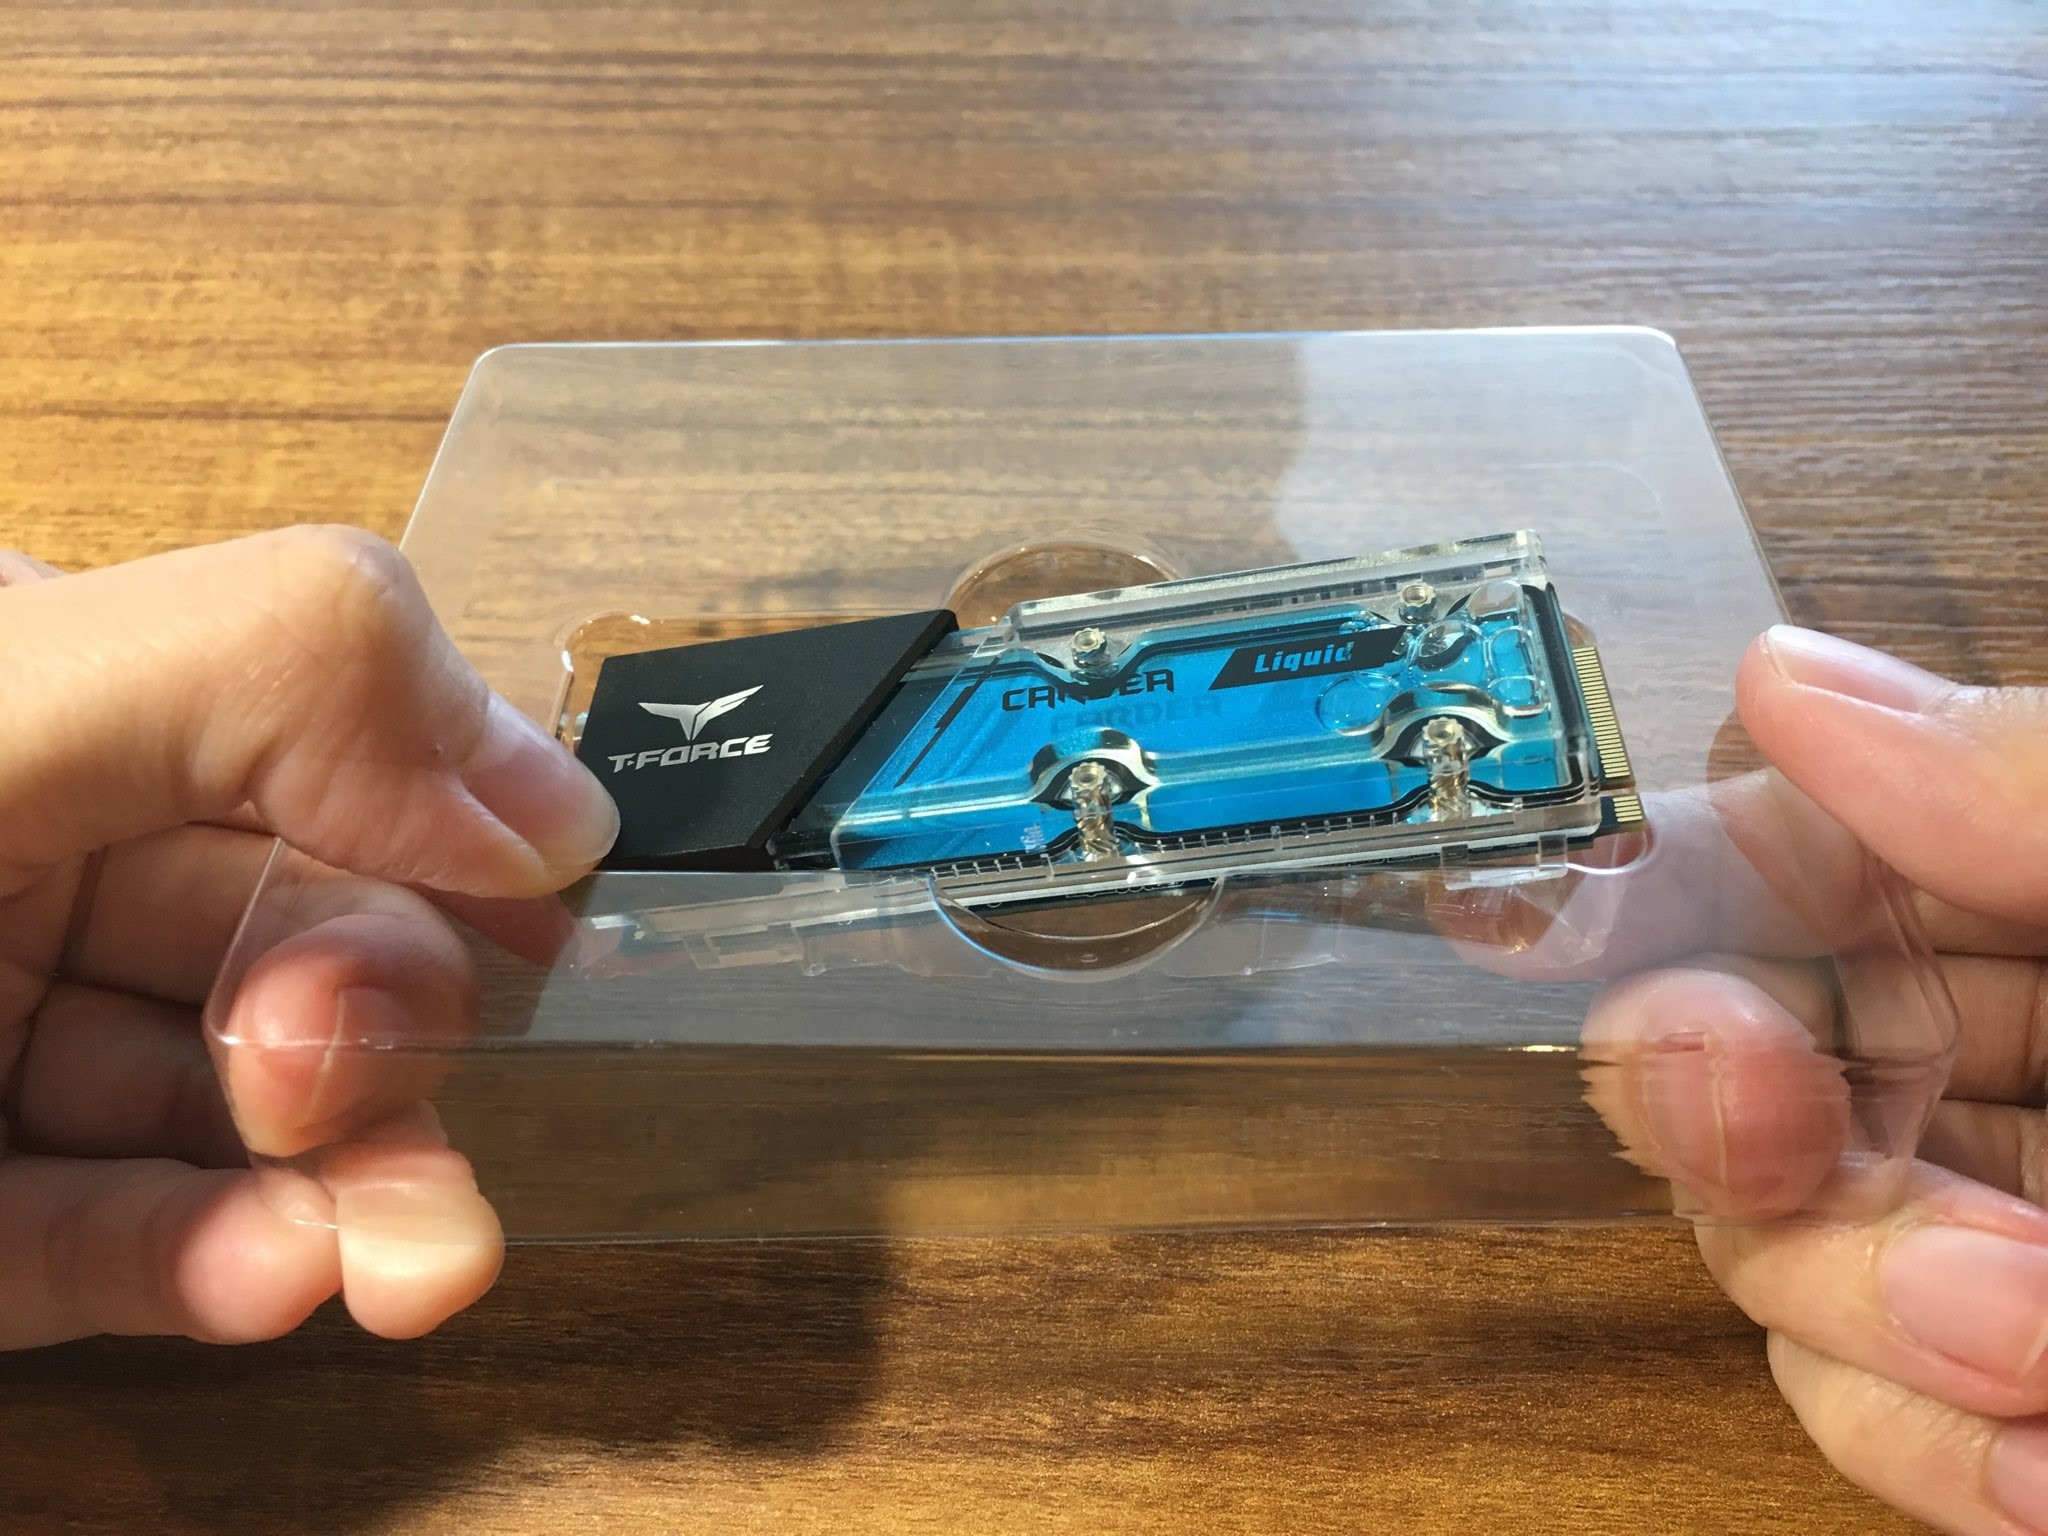
Unpacking an SSD package requires a few tips. Usually both 2.5” SATA and M.2 PCIe are protected inside a blister, especially M.2 SSD, which is thinner and more fragile than the memory, and may break in two if you unpack too violently. It is recommended that you push the SSD out of the blister instead of pulling it hard.
 3. Verify the installation location
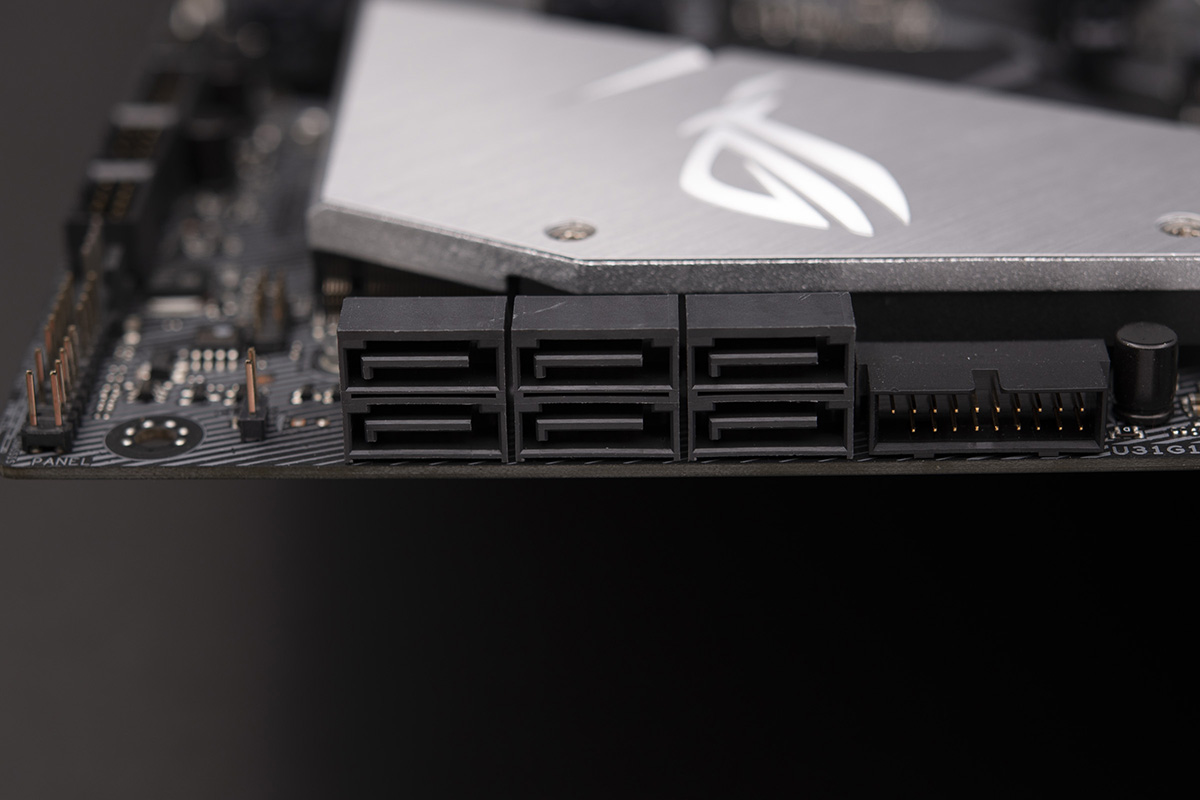
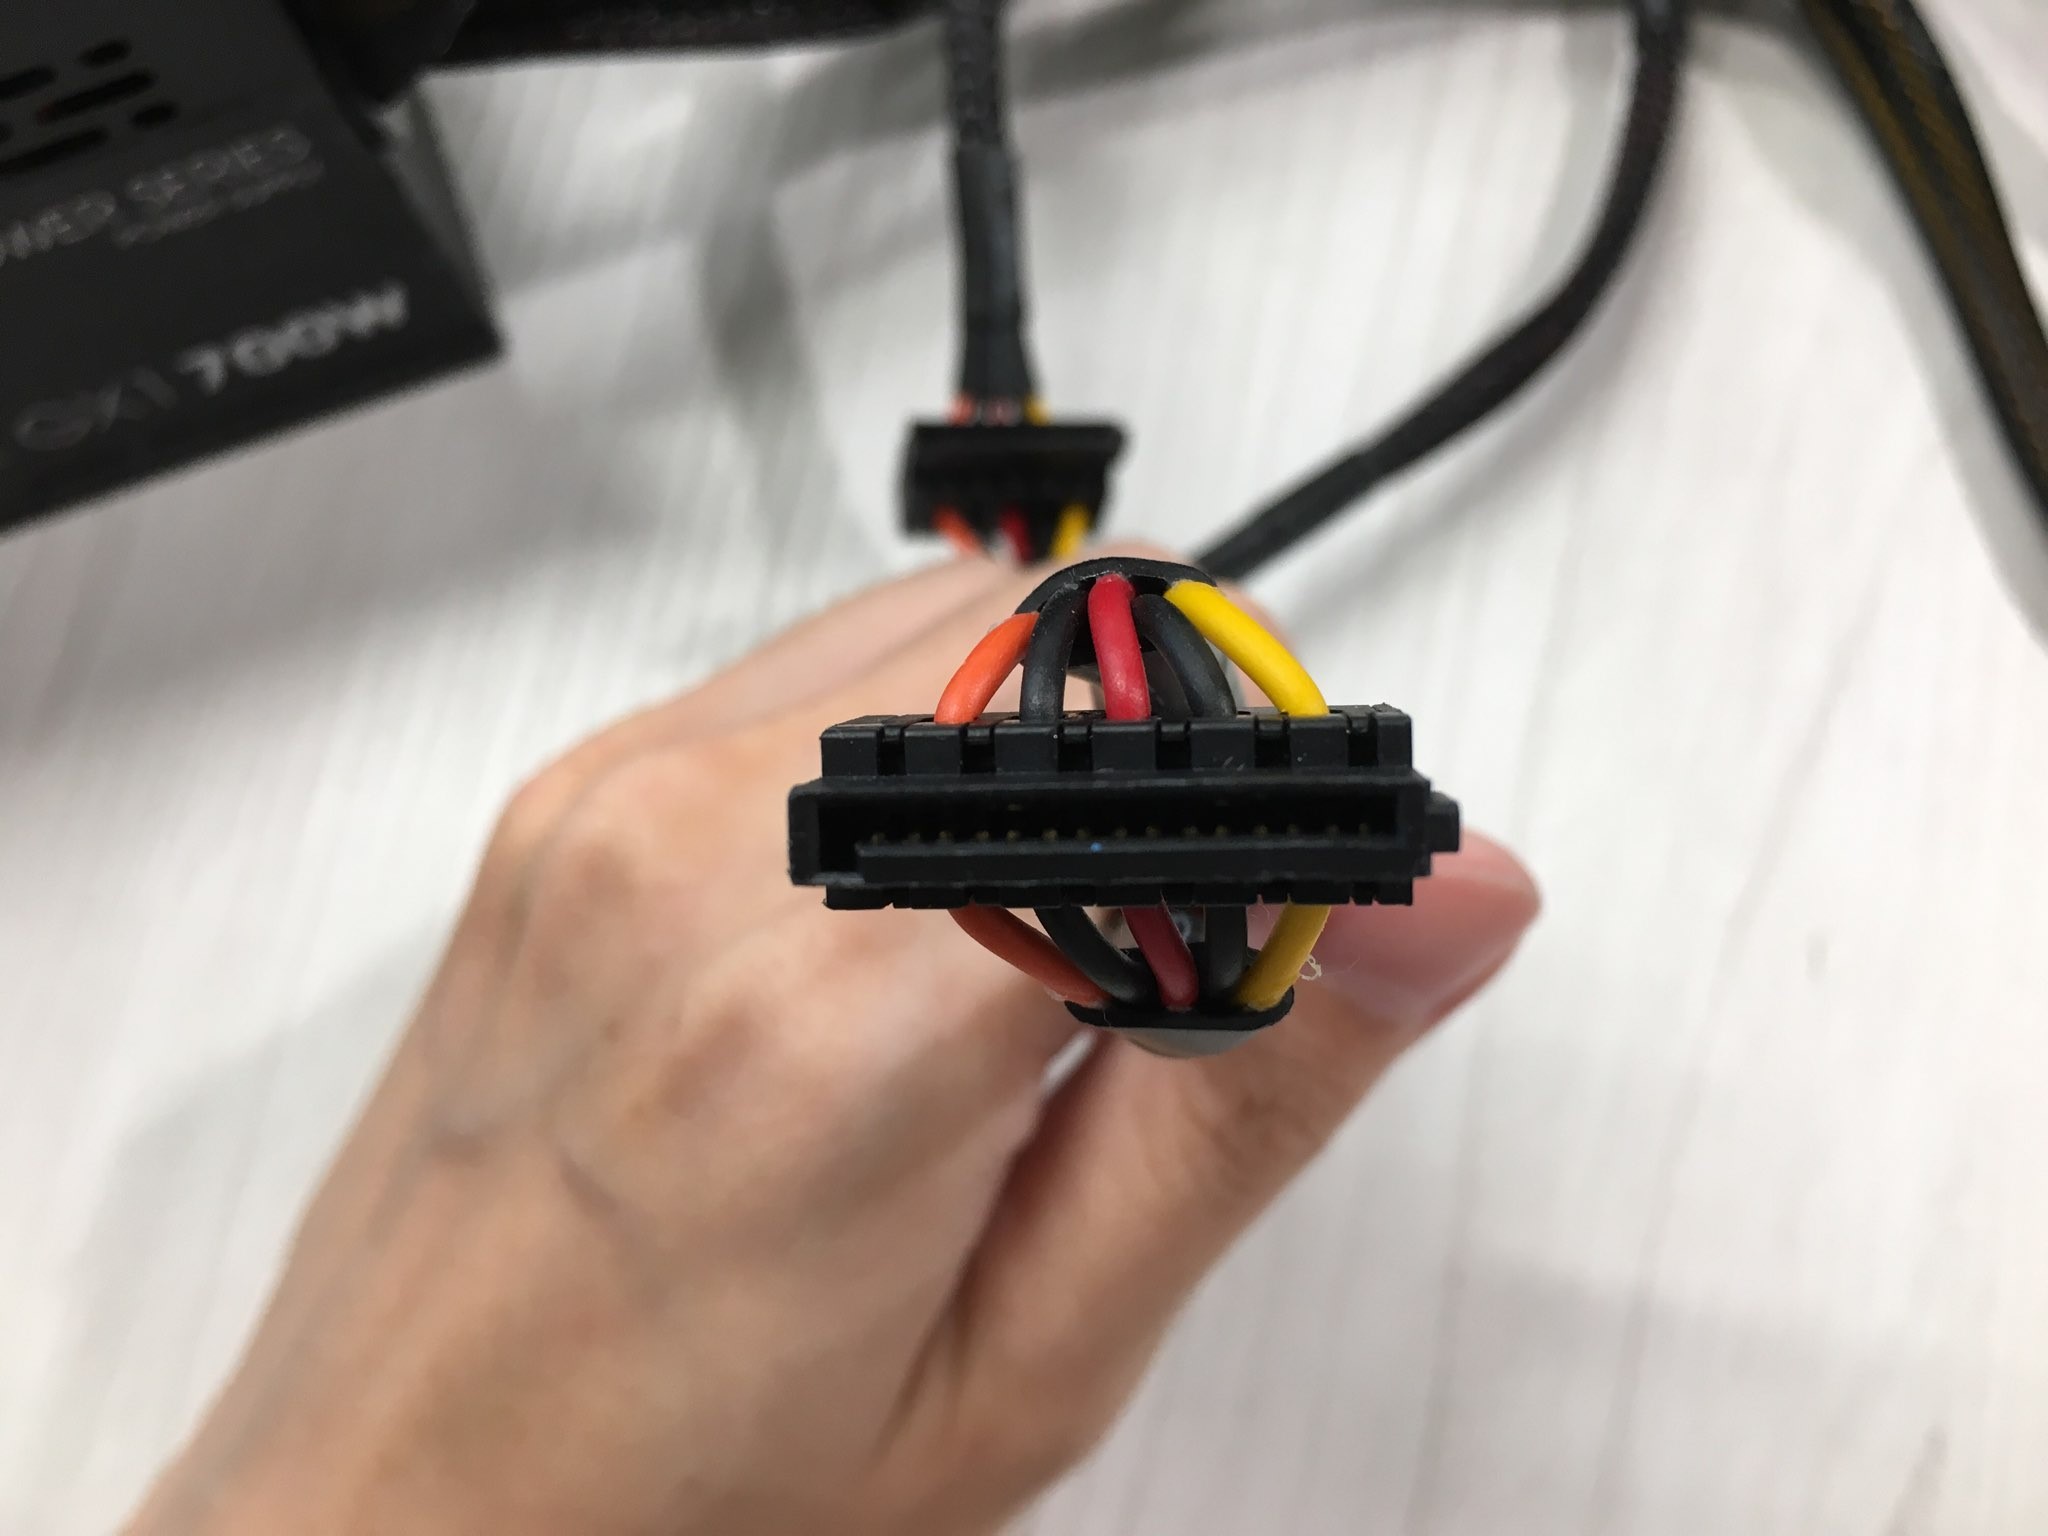
The interfaces of 2.5” SSD and M.2 PCIe are completely different, and the corresponding connection locations on the motherboard are different as well. The supported interface of 2.5” SSD is SATA and requires separate power and SATA cables. The detailed location is as shown
(Motherboard SATA location)
(Power cable)
(two ports of the 2.5” SSD)
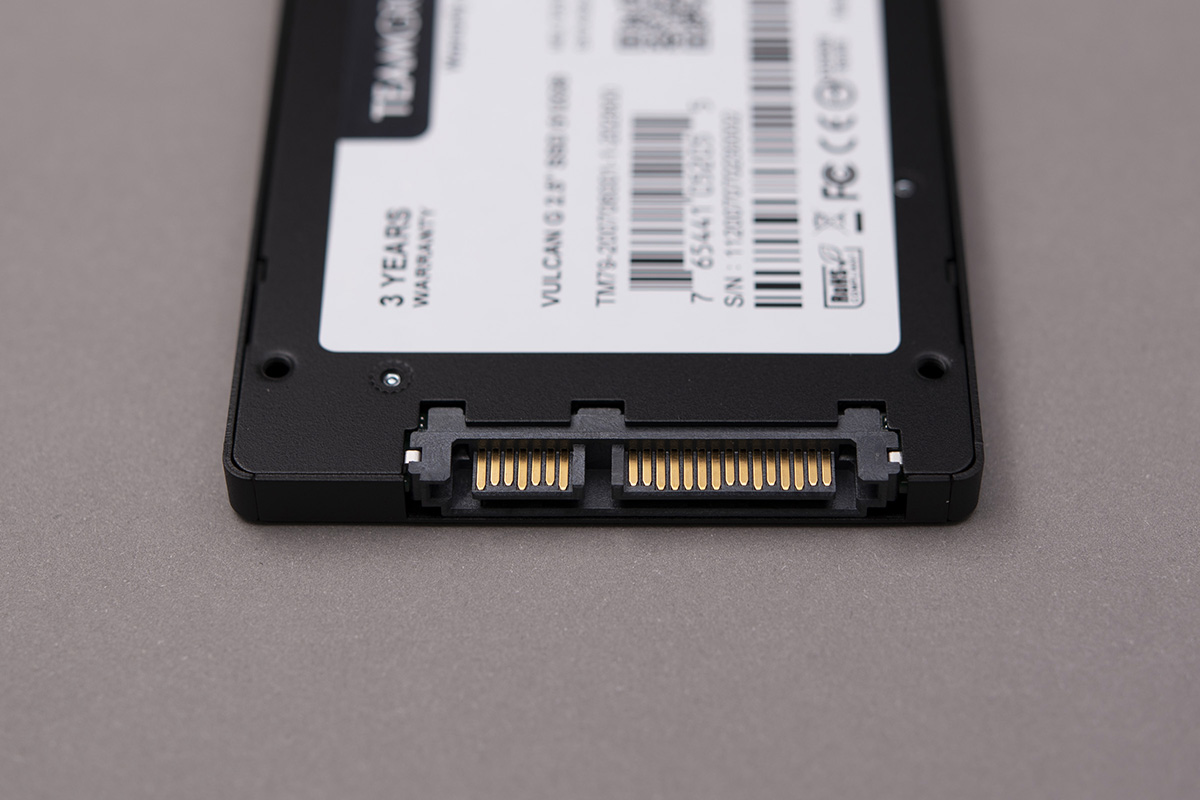
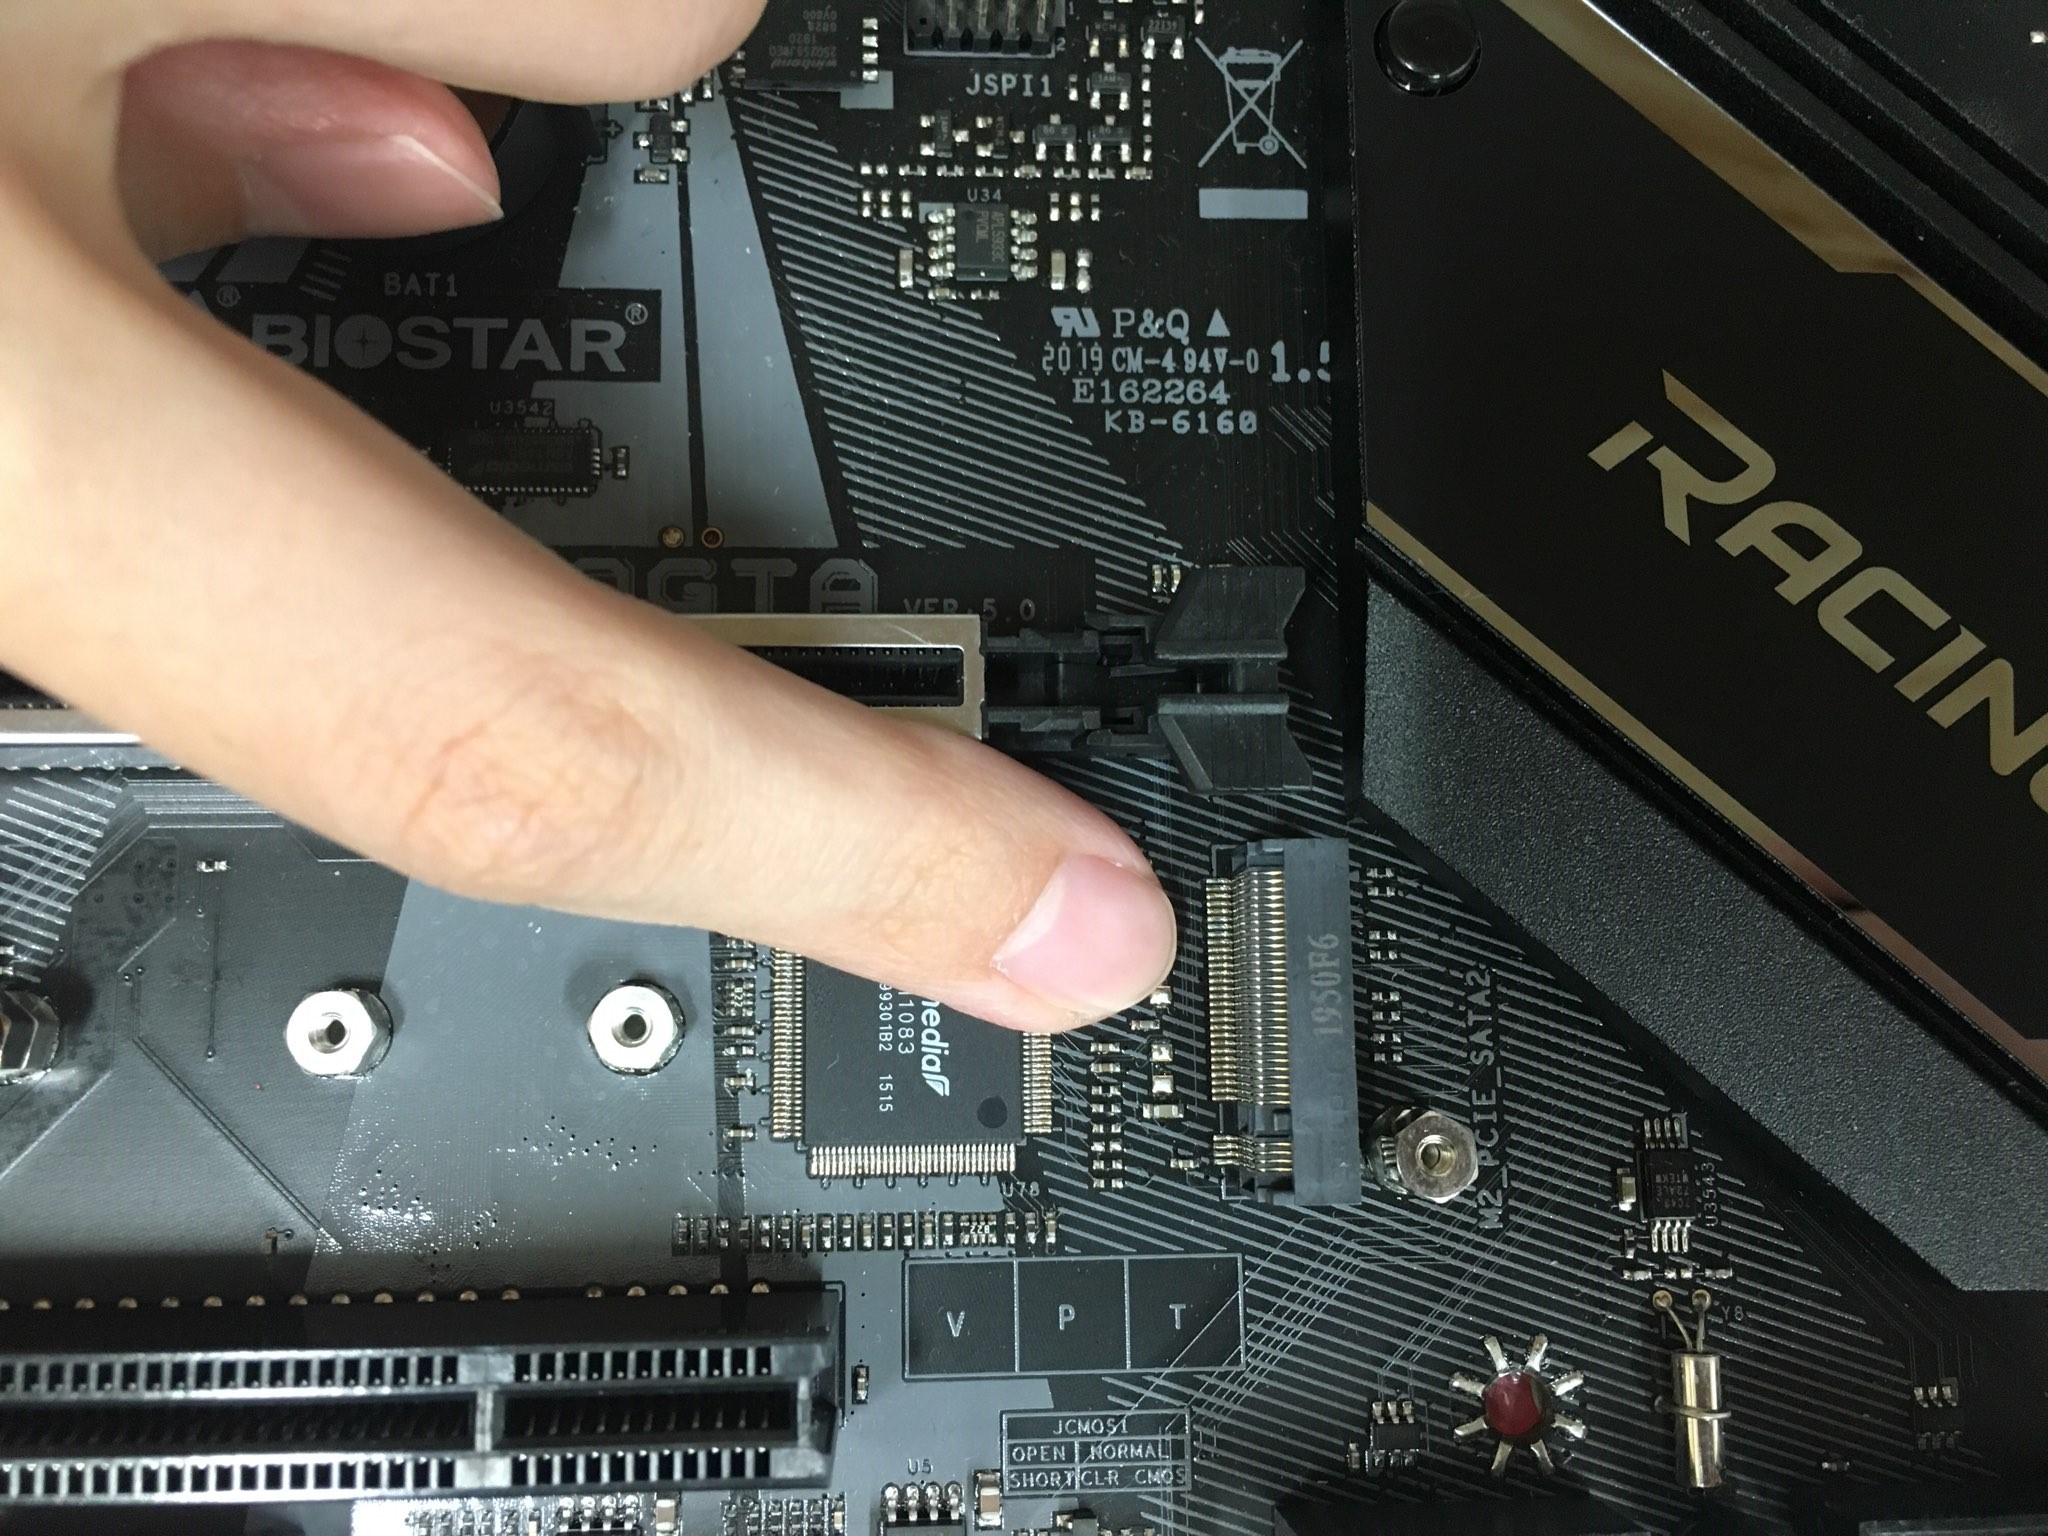
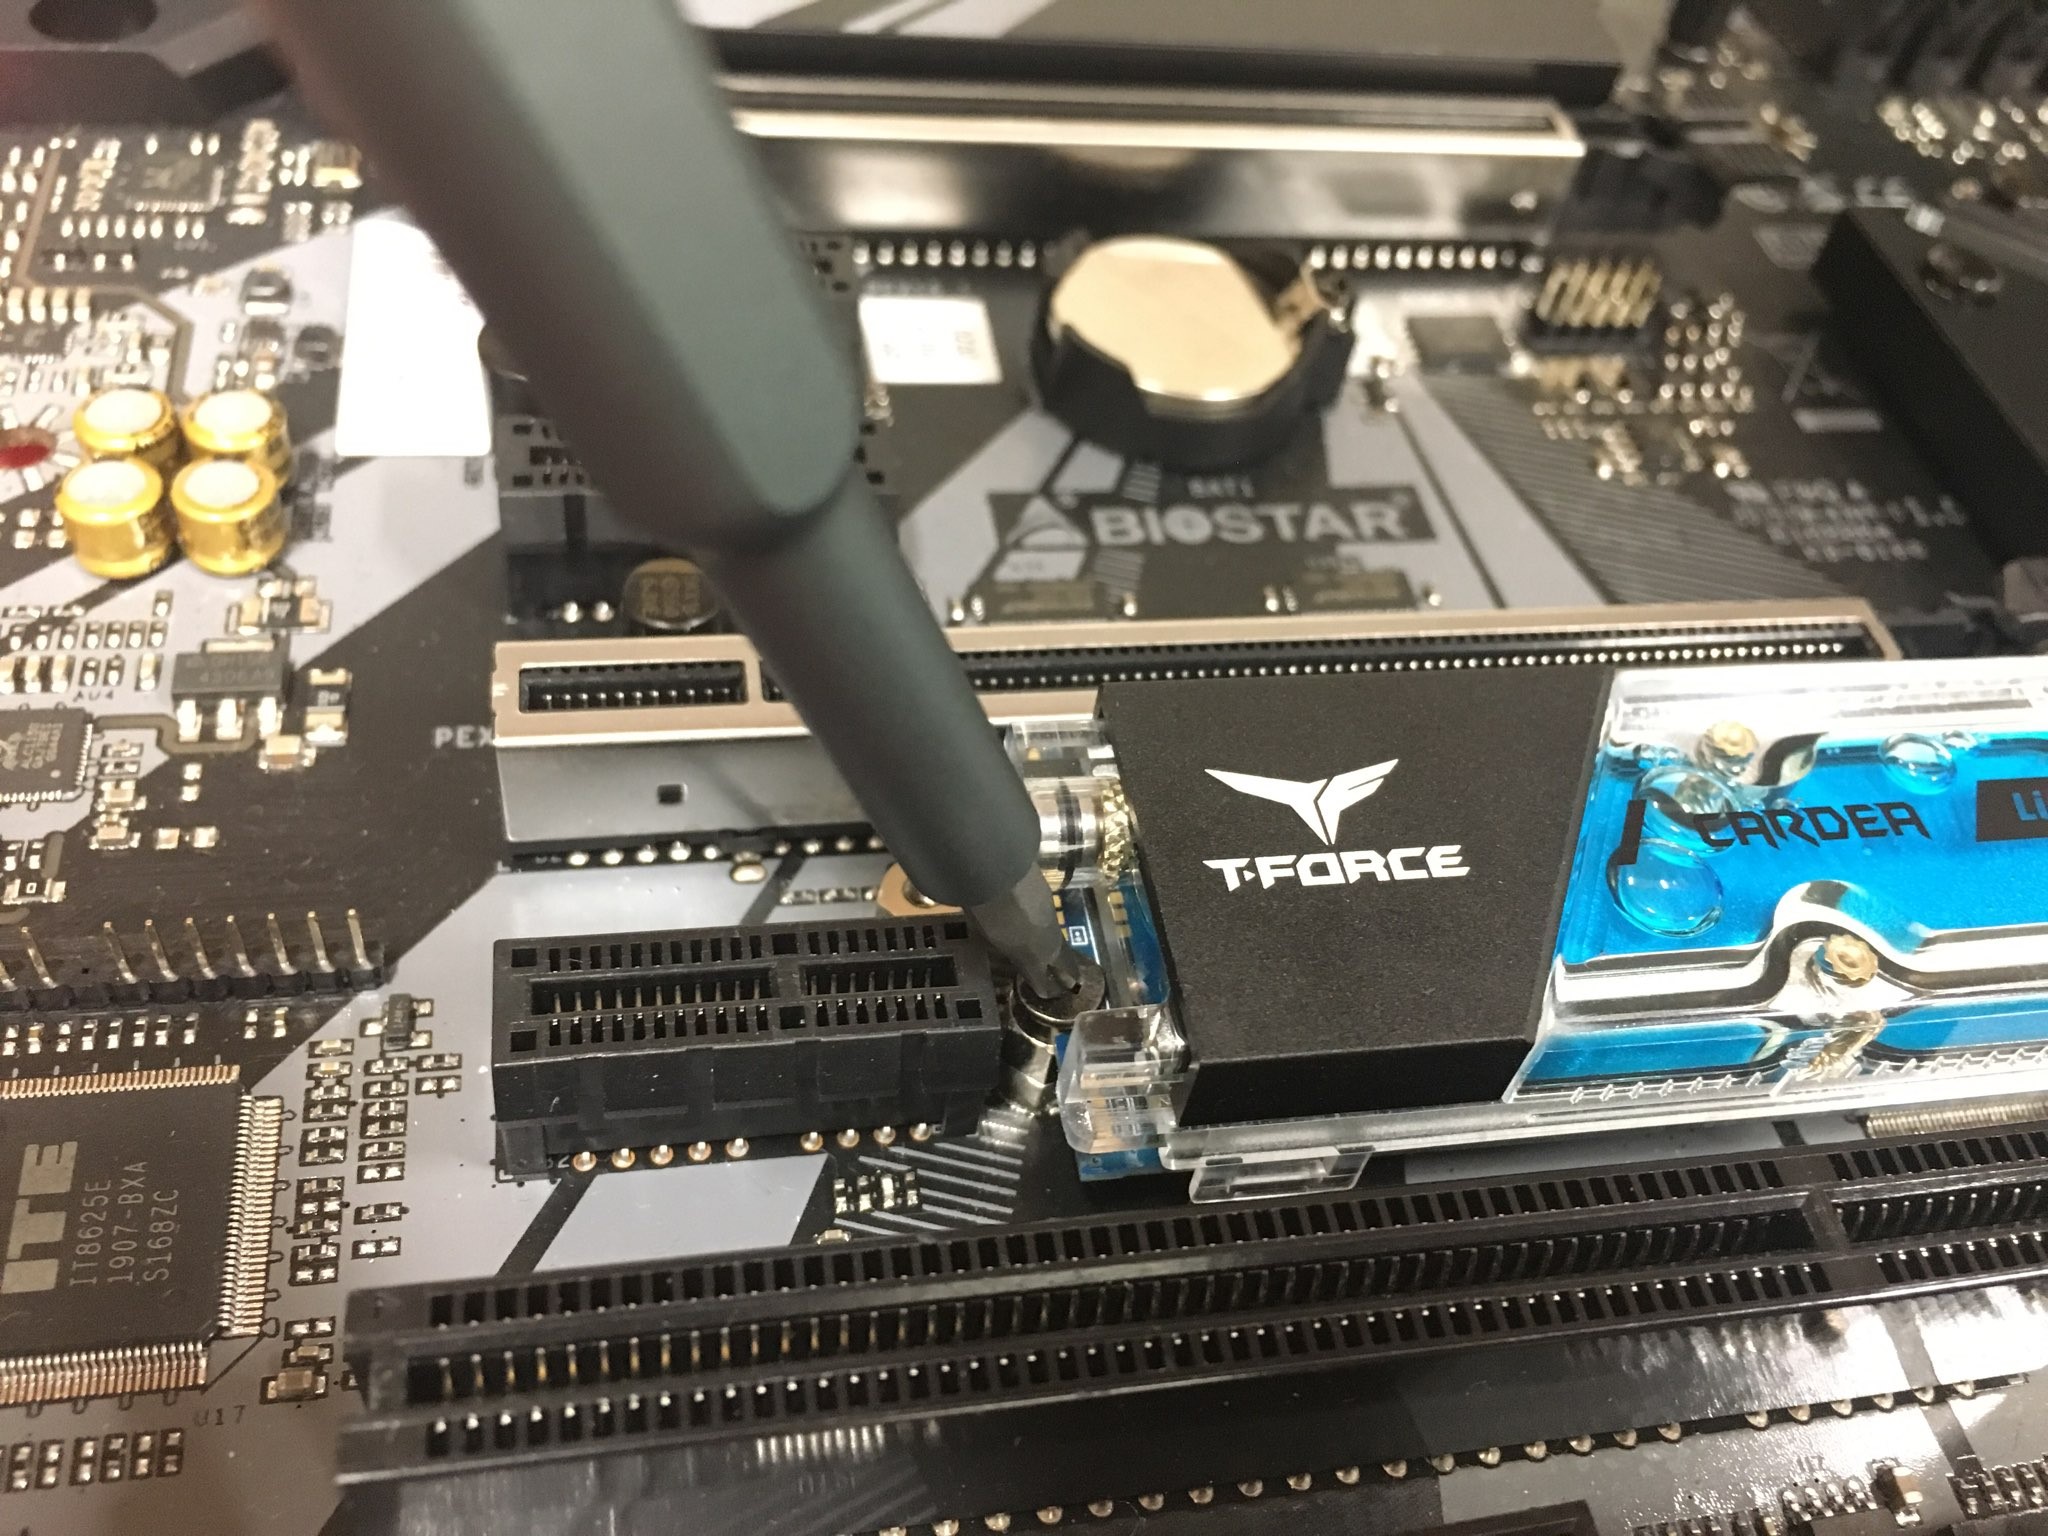
There’s nothing more annoying than having more and more cables in your PC, so the M.2 is simply a blessing to me, the editor. M.2 reduces two cables at a time, just need to plug and lock the M.2 onto the motherboard. The detail of the ports is as shown below
(Location of the M.2 on motherboard, lock using screws)
 4. Using as system drive
First, plug the UFD with Windows installation software into the computer and press DELETE to enter the BIOS. Make sure that the computer recognizes the newly installed SSD and UFD.
(BIOS screenshot)
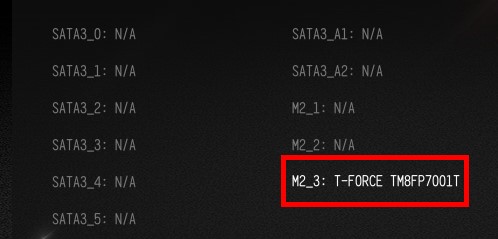
Then go to BOOT, move the UFD to the first position, and adjust the newly installed hard drive to the second position, press F10 to save the changes and leave the BIOS.
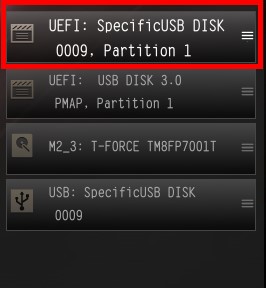
If the adjustments are made according to the above sequence, the computer should automatically reboot after leaving the BIOS and enter the Ready to install Windows screen.
Format the SSD before installing Windows. After formatting, you can choose whether to split the capacity. Local drive (C:) and Local drive (D:) are what comes out the after partitioning, commonly known as C drive and D drive.
If you have limited budget, you can setup a C drive with smaller capacity and a D drive with larger capacity, and try to install most of your applications in D drive. The simpler the C drive, the better. However, the downside of a single hard drive is that data may disappear if the hard drive is broken, so be sure to do an online cloud backup!
If your budget is sufficient, it is recommended to buy a smaller capacity SSD as a boot drive (C:) and a larger capacity SSD as a data drive (D:). This way, there is no need for partitioning, you can have two hard drives in different drives. You don’t have to worry about the data on the data drive being affected if the boot drive is not working properly.
5. Using purely as data drive
If you just want to expand a hard drive to store data, you can ski the previous step. However, you should pay attention that after installing and booting into Windows, you still can’t see the new drive because the hard drive has not been formatted and can’t be used directly
Now, please move your mouse cursor to the Windows icon on the lower left and right click on the mouse
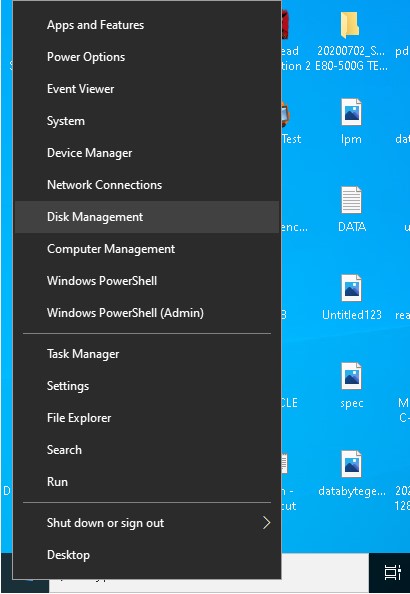
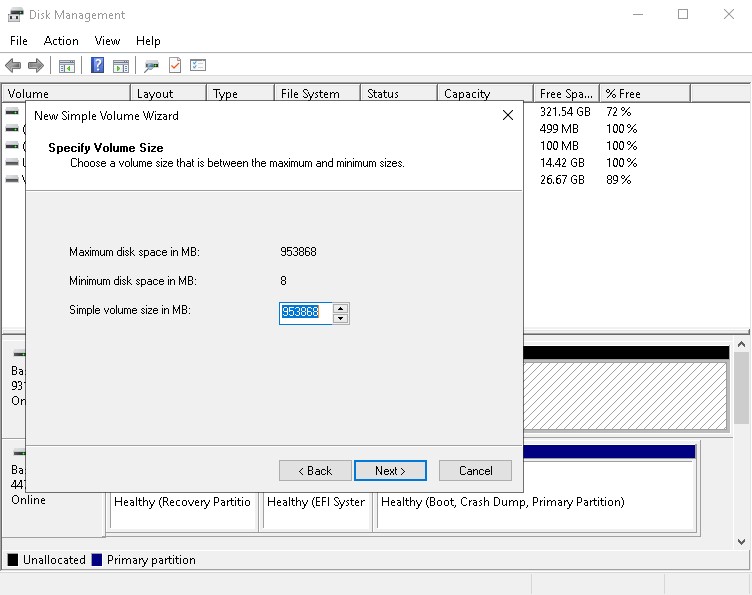
Next, select Disk Management. The SSD originally installed with Windows should be displayed as “Disk 0”, and your newly installed SSD will be displayed as “Disk 1”, as shown below
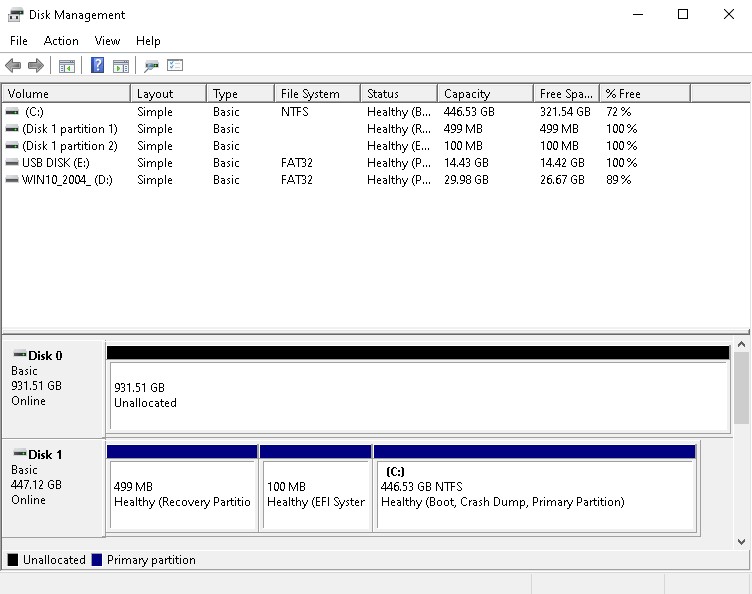
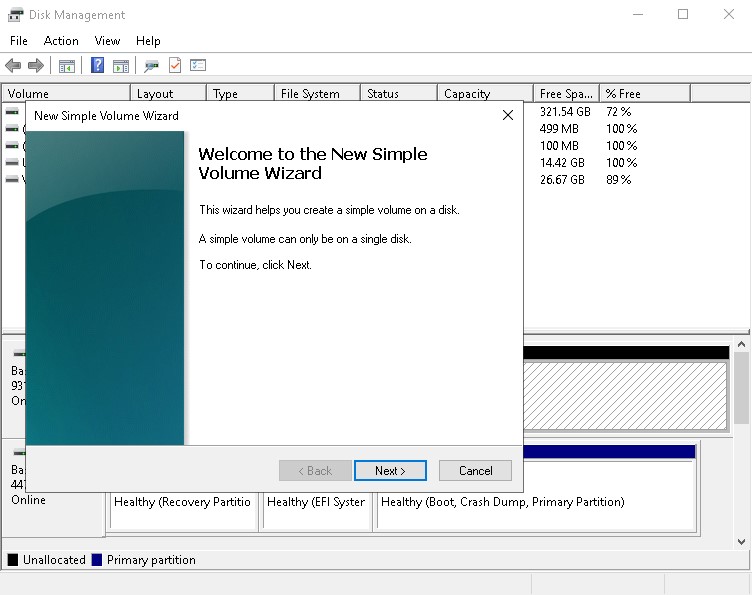
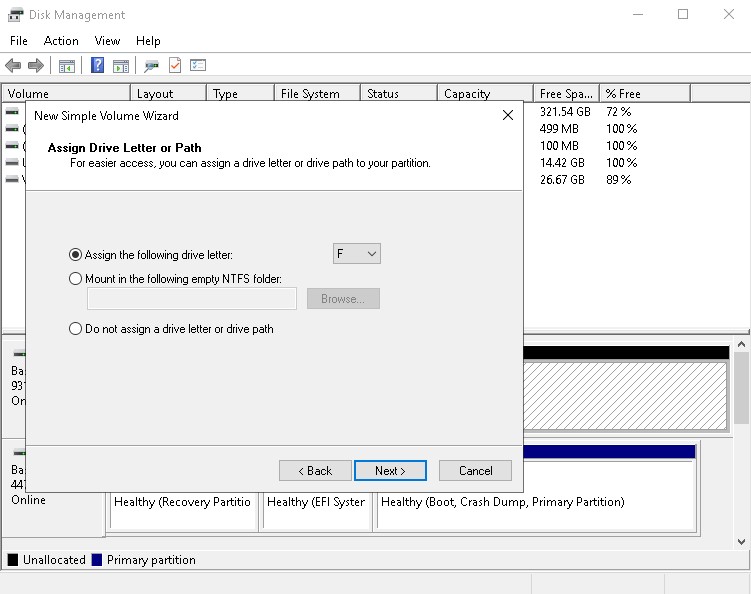
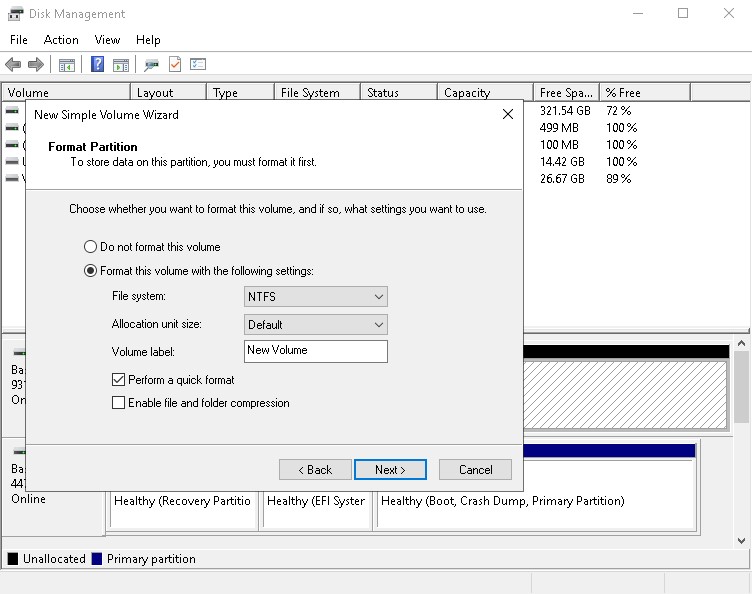
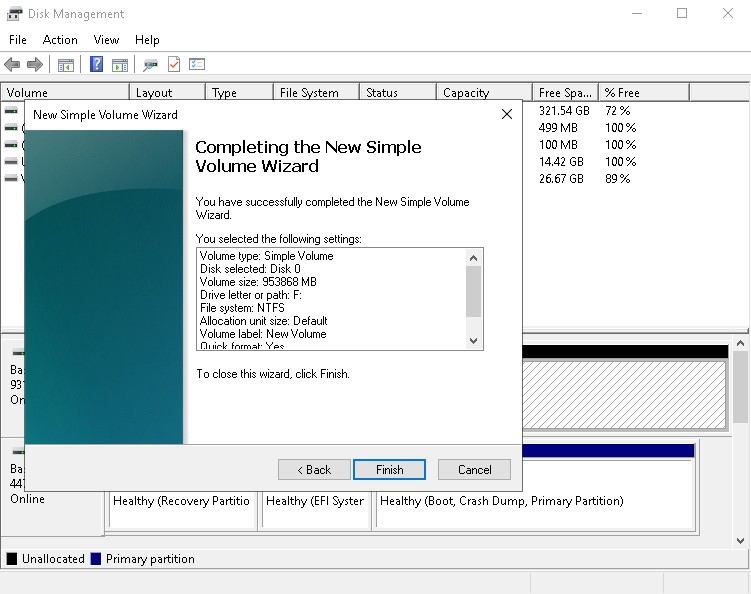
Please right click on the area of Disk 1 and select format. Usually the default NTFS format is used. Then press OK, the system will automatically start to format for you, and when the formatting is complete, you can see your new drive in the local machine!
 6. Verify if the speed is up to the standard
Nowadays, manufacturers in the market put the read/write speed of the SSD on the website and on the package.


There is an unwritten rule that the speed manufacturers labeled is actually the higher value of the data they can actually measure. If you have average luck, the data you get from your home test will be slightly lower than indicated but not far off. If you are lucky, you might also get a faster SSD! After all, even the same controller with the same Flash IC may not have the same result.
The following software is commonly used to test SSDs. The first thing you should do is to see if the Sequential speed (Sequential read/write speed) is the same as indicated.
First let’s take a look at the
CrystalDiskMark (CDM) which is the most commonly used software.
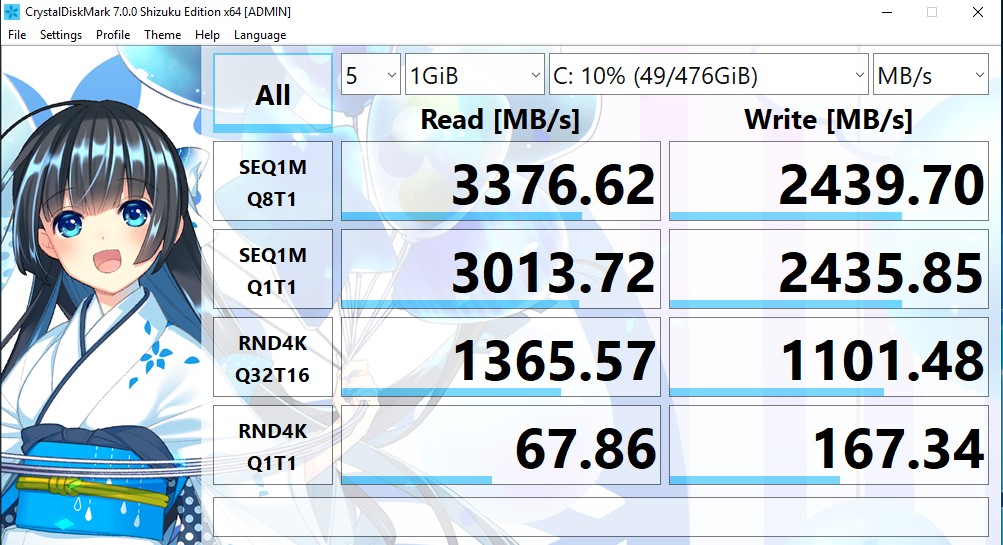
The speed test of this software is quite accurate, so it is a software used commonly by both manufacturers and reviewers, and it’s also pretty fast in updating content. Just click All on the upper left to use it
Next is the
AS SSD Benchmark, which is commonly seen in reviews
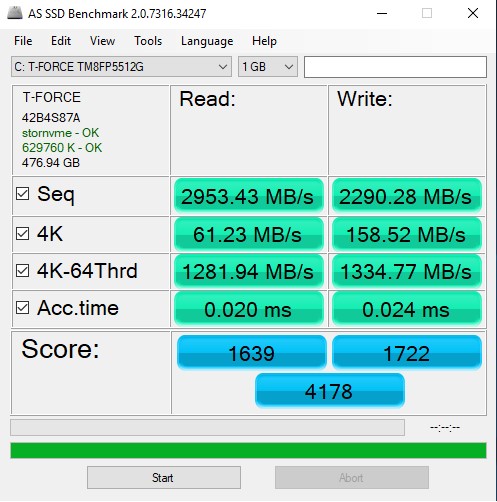
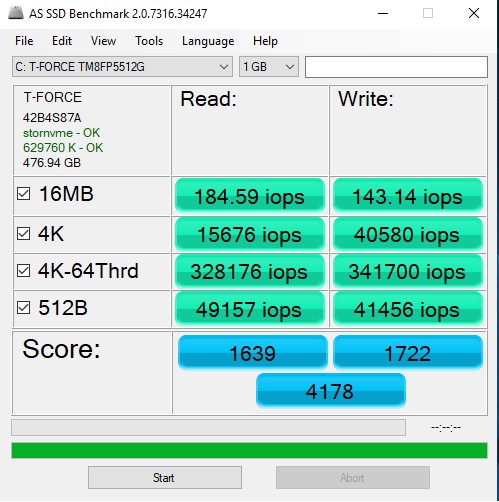
In addition to testing the read/write speed, this one can also switch to IOPS data from the View on the upper location, which is quite a unique function. Just press Start at the bottom and wait for a while, it is very easy to use.
There are a lot of speed software available online, so if you are interested in, you can download them and try them for fun!
In fact, the advanced application of SSD also includes different types of RAID methods, which will be explained later. I’ll end today’s introduction here, and I hope it can help those who are not familiar with how to operate the internal parts of the computer. After reading this article, you can bravely take your first step towards DIY a PC!


